

Every Great Cut Starts as a Shape
The Sketch on the Back of a Receipt
A few years back, a regular named Dev walked in holding a crumpled receipt. On the back he’d drawn a lopsided oval with two little ears and a scribble on top.
“This is my head,” he said. “And this is what I think is wrong with it.”
I laughed, but then I looked closer. He’d drawn a bump at the back and a flat stretch on the left side. He’d shaded the sides darker than the top. Without knowing it, he’d drawn exactly what I see every time someone sits in my leather chair: a shape, with weight, edges, and angles.
We spent ten minutes talking over that receipt while the hot towel steamed on the warmer. By the end, Dev understood why his last three cuts had felt “off.” The weight sat in the wrong spot. The angles fought the bump at the back. Nothing was badly cut, exactly. It just wasn’t built for his head.
I still think about that sketch. It seems most men already sense the geometry of their hair. They simply don’t have the words for it yet.
Why Geometry Belongs in the Chair
When people hear “geometry,” they often picture a dusty classroom, a protractor, and a teacher who never smiled. But geometry is really just the study of shapes, lines, and how they relate. And that’s what a haircut is.
Every time I lift a section of hair, I’m choosing an angle. Every time I cut, I’m creating a line. Every time I step back, I’m judging proportion: is the top too heavy for the sides? Does the back curve the way the skull curves?
My first mentor in the barbershop where I trained used to tap his temple and say, “Cut with your eyes first, hands second.” It took me years to understand him. Perhaps what he meant was that the scissors only follow a plan the mind has already drawn.
A good cut isn’t luck. It’s a set of small, thoughtful geometric decisions stacked one on top of another, like bricks in a wall that stays standing.
What You Might Notice After Reading This
You don’t need to pick up the clippers to benefit from this. My hope is simply that you’ll start to see your hair differently. You might notice:
- Where weight sits on your head, and whether it helps or hurts your face shape
- How angles shape the difference between a soft cut and a sharp one
- Why proportion matters more than exact length
- Which questions to ask your barber to get a cut built for you
- How your shape changes as it grows out
What would change, I wonder, if you walked into your next appointment already knowing the language your barber thinks in? Let’s start with that language.
The Language of Lines, Angles and Planes
Horizontal, Vertical and Diagonal Lines
Every haircut is made of lines, and each kind of line does a different job. I noticed long ago that when clients learn this, they start describing what they want much more clearly.
| Line Type | Where You See It | What It Does to the Look | Common Use |
| Horizontal | Blunt fringe, flattop top, blocked neckline | Adds width, feels stable and heavy | Strong, structured styles |
| Vertical | Layering through the sides, sideburns | Adds length, removes bulk | Slimming wide faces |
| Diagonal forward | Hair angled toward the face | Frames the face, adds movement | Fringe and textured crops |
| Diagonal back | Hair angled away from the face | Opens the face, adds sweep | Pompadours, slick backs |
| Curved | Ear outlines, rounded necklines | Softens corners | Natural, forgiving shapes |
Think of these lines like the lines on a football field. Each one tells players where to go. In a Child’s haircut, each one tells the eye where to travel.
Elevation: The Angle That Builds the Shape
Elevation is how far a section of hair is lifted away from the head before it’s cut. It’s measured in degrees, and it might be the single most important idea in haircutting geometry.
| Elevation | How Hair Is Held | Result | Typical Style |
| 0 degrees | Flat against the head | Solid, one-length weight line | Blunt bobs, heavy fringes |
| 45 degrees | Halfway between flat and straight out | Graduation, stacked weight | Tapered backs, classic men’s cuts |
| 90 degrees | Straight out from the head | Uniform layers, even length all over | Crew cuts, textured shapes |
| 180 degrees | Straight up overhead | Increased layers, longer at the bottom | Long, layered styles |
It’s a bit like throwing a ball. Same arm, same strength, but change the angle of release and the ball lands somewhere completely different. Change the elevation of the hair, and the shape lands somewhere new.
Planes, Weight and Graduation
Your head isn’t one smooth surface. It’s made of several planes: the top, the two sides, the back, and the nape. Each one faces a different direction, and each one catches light differently.
Weight is where hair builds up and creates bulk. Graduation is when shorter hair sits underneath slightly longer hair, stacking like shingles on a roof. A tapered back is graduation in action.
When I’m working, I’m always asking, “Where does this plane end, and how do I help it meet the next one?” Perhaps that’s the quiet heart of the whole craft. Smooth transitions between planes look natural. Rough ones look like a stair someone forgot to finish.
These ideas feel modern, but they’re older than you might expect.
A Short History of Measured Hair
Vitruvius, Da Vinci and the Ideal Head
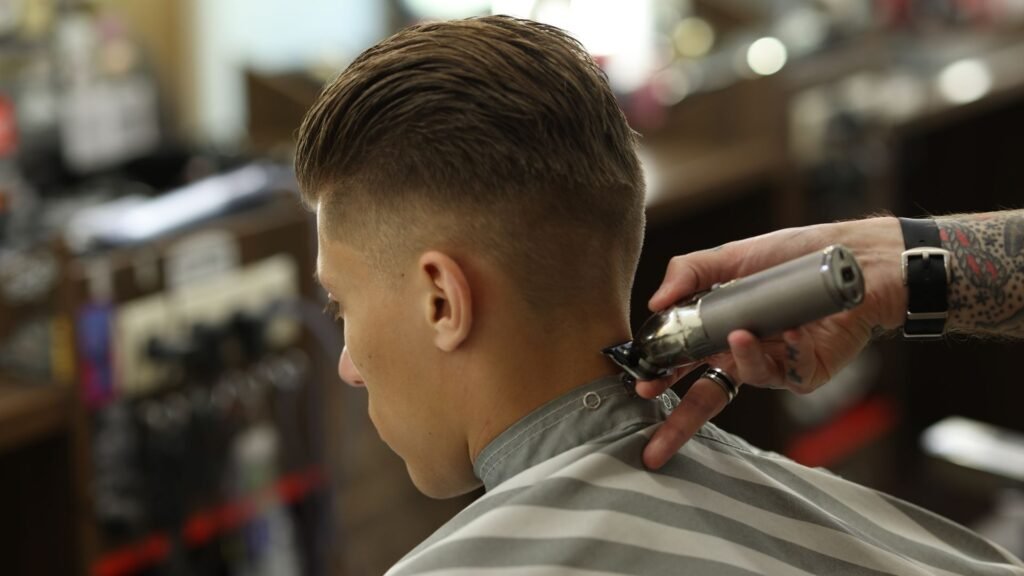
The Roman architect Vitruvius wrote about human proportions more than two thousand years ago, describing how the face could be divided into equal parts. Around 1490, Leonardo da Vinci drew his famous Vitruvian Man, inspired by those writings.
Da Vinci also sketched faces divided into thirds: hairline to brow, brow to nose, nose to chin. That idea still shows up in the chair. When I add height to a man’s hair, I’m playing with that top third. When I add a fringe, I’m shrinking it.
It seems strange to think that a guy getting a quiff on a Tuesday afternoon is part of a conversation that started in ancient Rome. But he is.
The Military Cut and the Flat Comb
During World War II, millions of men got short, practical cuts. After the war, many kept them. The 1950s flattop became a symbol of discipline and order.
Barbers used flat-top combs, sometimes with a little leveling bubble built in, to make the top as flat as a tabletop. I’ve still got one in my drawer. It smells faintly of old tonic, and when I hold it, I can almost hear the hum of those old shop radios.
Sassoon and the Geometric Revolution
In the early 1960s, London stylist Vidal Sassoon changed hairdressing forever. He treated hair like architecture, cutting sharp, geometric bobs that fell into place without setting or teasing. His “five-point cut” became legendary.
Sassoon’s methods spread into training programs worldwide, and the ideas of elevation, sectioning, and guidelines he helped popularize are still taught in schools today.
The Fade Era and Precision Blending
| Era | Signature Style | Geometric Idea | Key Technique |
| Ancient Rome | Short cropped cuts | Facial proportion | Shears and razors |
| 1490s | Renaissance study | Thirds of the face | Artistic measurement |
| 1940s | Military cuts | Practical uniformity | Clippers |
| 1950s | Flattop | Perfect horizontal plane | Flat comb leveling |
| 1960s | Sassoon geometry | Architectural shapes | Sectioning and elevation |
| 1980s | Hi-top fade | Tall vertical geometry | Sculpting from all sides |
| 2000s | Faux hawk | Center ridge symmetry | Midline sectioning |
| 2010s | Skin fade | Seamless gradient | Multiple guards, blending |
| 2020s | Textured crops, modern mullets | Soft, natural geometry | Dry cutting, point cutting |
The fade might be the most geometric cut of all. It’s a gradient, a smooth slope from skin to hair, and getting it right means controlling length by fractions of an inch.
I noticed that styles change every decade, but the geometry underneath them stays remarkably steady. So why does the eye care so much about proportion in the first place?
Why Proportion Pleases the Eye
The Brain Is a Pattern Hunter
Your brain is constantly looking for patterns. Psychologist Gillian Rhodes of the University of Western Australia has published extensive research showing that people tend to rate more symmetrical faces as more attractive. It seems we read balance as a sign that things are in order.
That instinct doesn’t switch off when we look at hair. A sideburn slightly longer on one side, or a top that slopes when it should sit level, can feel wrong before anyone can say why. The eye catches it. The mind follows a second later.
The Golden Ratio: Useful Guide or Overrated Myth?
The golden ratio, roughly 1.618 to 1, shows up in seashells, sunflowers, and centuries of art. Some people claim it’s the secret to the perfect face.
Here’s where I’d gently push back. A 2010 study by Pamela Pallett, Stephen Link, and Kang Lee, published in Vision Research, found that faces were judged most attractive when the distance between the eyes and mouth was about 36 percent of face length, and the space between the eyes was about 46 percent of face width. Those numbers don’t match the golden ratio neatly. Perhaps proportion matters, but the “magic number” is more flexible than the legend suggests.
| Idea | Golden Ratio Approach | Real-World Barber Approach |
| Goal | Hit a precise mathematical ratio | Make the face look naturally balanced |
| Flexibility | Rigid | Adapts to each head |
| Useful for | Art theory, general guidance | Daily cutting decisions |
| Weakness | Ignores hair texture, growth, lifestyle | Relies on trained judgment |
Facial Thirds and Fifths
A more practical tool is the thirds and fifths system. The face splits into three horizontal sections, as Da Vinci sketched, and into five vertical sections, each roughly one eye wide.
| Measurement | Ideal Guide | If It’s Longer | Haircut Adjustment |
| Upper third (hairline to brow) | Equal to the others | Long forehead | Add fringe, reduce height |
| Middle third (brow to nose) | Equal to the others | Long midface | Add width at sides |
| Lower third (nose to chin) | Equal to the others | Long chin or jaw | Fuller sides, consider a beard |
| Facial width (five eyes) | Five equal fifths | Wide face | Tighter sides, more height |
Facial anthropometry pioneer Dr. Leslie Farkas spent decades measuring real faces and found that very few people match these classical canons exactly. That’s comforting, isn’t it? The rules are a starting point, not a test you can fail.
And just as faces vary, so do the skulls underneath them.
Mapping Your Head Like a Blueprint
The Parietal Ridge: Where the Head Turns a Corner
Run your hand from the side of your head up toward the top. Somewhere along the way, you’ll feel the head curve and turn upward. That’s the parietal ridge, the widest part of the upper head.
For a barber, this ridge is a major landmark. It’s often where the top meets the sides, and where a weight line naturally sits. Cut too high above it, and the head can look narrow. Leave too much bulk right on it, and the head can look wide and boxy.
The Occipital Bone and the Nape
The occipital bone is the bump at the back of your skull. Below it sits the nape, the soft area where your neck begins.
If a fade or weight line lands right on the occipital bone, it can create a hard shelf. I tell clients it’s like hanging a picture on a bumpy wall. You’ve got to account for the bump, or the frame sits crooked.
Reference Points and Measuring Without a Ruler
| Reference Point | Location | Why It Matters |
| Center front | Middle of the front hairline | Anchors the part and fringe |
| Top of head | Highest point when standing | Sets height balance |
| Parietal ridge | Widest point of the upper head | Common weight line placement |
| Crown | Where the whorl spirals | Controls lift and lay |
| Occipital bone | Bump at the back | Affects fade and taper placement |
| Nape | Base of the hairline at the neck | Sets the neckline shape |
| Ear front and back | Around each ear | Guides side outlines |
Barbers rarely use rulers. Instead, we measure with landmarks, fingers, and eyes. Two fingers’ width above the ear. Level with the top of the eyebrow. The middle of the earlobe. These little measurements become second nature, like a carpenter who can eyeball a straight board from across the garage.
Once the head is mapped, the next step is looking at the face it carries.
Face Shapes Through a Geometric Lens
Round vs. Square
Here’s our first direct comparison. A round face has soft curves and similar width and length. A square face has a strong jaw, a broad forehead, and sharper corners.
| Factor | Round Face | Square Face |
| Geometric goal | Add angles and length | Show off or soften angles |
| Sides | Tight, faded | Short to medium |
| Top | Height and volume | Moderate height |
| Lines to favor | Vertical and diagonal | Horizontal or curved |
| Styles that work | Quiff, pompadour, high fade | Crew cut, side part, buzz cut |
| What to avoid | Round, bowl-like shapes | Overly boxy, flat tops on wide jaws |
With a round face, I’m usually trying to create the illusion of corners. With a square face, I’m deciding whether to celebrate those corners or soften them a bit.
Oval vs. Oblong
The oval face is often called the “ideal” shape because it’s balanced in width and length. The oblong face is longer and narrower.
| Factor | Oval Face | Oblong Face |
| Geometric goal | Maintain balance | Reduce visual length |
| Height on top | Flexible | Keep it low |
| Sides | Most lengths work | A bit fuller |
| Fringe | Optional | Helpful |
| Styles that work | Almost anything | Caesar, fringe crop, side part |
If you’ve got an oblong face, piling height on top is like adding another story to a tall building. It just makes it taller.
Diamond, Heart and Triangle
These shapes have the most interesting geometry.
| Face Shape | Key Features | Geometric Goal | Suggested Approach |
| Diamond | Wide cheekbones, narrow forehead and chin | Widen forehead area | Textured fringe, fuller top |
| Heart | Wide forehead, narrow chin | Balance the top | Side-swept fringe, less height, add a beard |
| Triangle | Narrow forehead, wide jaw | Widen the top | Volume on top, fuller upper sides |
Kids’ faces change fast, too. When a dad books a kids haircut, I often remind him that a child’s head is larger relative to his body than an adult’s, and his face proportions will keep shifting for years. The shape that suits a seven-year-old may look completely different at twelve.
Knowing your face shape is helpful. But how do we keep everything feeling settled?
Balance: Formal vs. Informal
Formal Balance and the Mirror Image
Formal balance means both sides are mirror images. Think of a buzz cut, a crew cut, or a centered high-top. Fold the head down the middle, and the halves match.
It’s clean, orderly, and timeless. But it’s also unforgiving. If your ears sit at different heights or your hairline recedes more on one side, formal balance can expose those differences.
Informal Balance and the Side Part
Informal balance means the sides are different, but the overall shape still feels settled. A side part is the classic example: one side carries more hair, yet the whole thing looks intentional.
| Factor | Formal (Symmetrical) Balance | Informal (Asymmetrical) Balance |
| Definition | Mirror-image sides | Different sides, equal visual weight |
| Examples | Buzz cut, crew cut, center part | Side part, swept fringe, asymmetrical crop |
| Forgiveness | Low | High |
| Hides uneven features | Rarely | Often |
| Feel | Disciplined, classic | Relaxed, personal |
| Maintenance | Frequent | Moderate |
It’s a little like a seesaw on a playground. A big kid near the middle can balance a small kid at the far end. The weights differ, but the board sits level.
Finding Center When Nothing Is Centered
So where’s the center of a head that isn’t perfectly even? I usually look at a few things: the bridge of the nose, the middle of the chin, the center of the front hairline. When those don’t agree, I go with what looks right from three or four feet away.
I noticed that clients sometimes worry when I tell them their face isn’t symmetrical. But nobody’s is. Isn’t it a relief to know you’re not chasing something that doesn’t exist?
Balance sets the stage. Angles do the heavy lifting.
The Angles That Change Everything
Zero Degrees vs. Ninety Degrees
These two elevations produce completely different shapes, and they’re worth comparing directly.
| Factor | 0-Degree Elevation | 90-Degree Elevation |
| How hair is held | Flat against the head | Straight out from the head |
| Weight | Maximum, at the perimeter | Evenly distributed |
| Shape | Solid and heavy | Rounded, follows the skull |
| Movement | Minimal | Moderate |
| Best for | Blunt fringes, strong lines | Crew cuts, textured shapes |
| Risk | Can look bulky | Can look flat on fine hair |
A 0-degree cut is like a brick wall: solid and heavy. A 90-degree cut is like a dome: smooth and even, curving with the head underneath.
The 45-Degree Sweet Spot
Many classic men’s cuts live at 45 degrees. That elevation creates graduation, a gentle stacking of weight that makes the back look full and rounded without bulk.
When I’m tapering the back of a classic businessman’s cut, I’m often working around 45 degrees. It’s the middle path, and perhaps that’s why it suits so many heads. It’s neither too heavy nor too light.
Finger Angle and Over-Direction
Two more angles matter. Finger angle is the angle of my fingers (and the shears) as I cut. Holding them parallel to the head creates even length. Tilting them creates length that changes gradually.
Over-direction means pulling hair away from its natural fall before cutting. Pull it toward the back, and when it falls, it’ll be longer at the front. It’s a subtle trick, like a quarterback leading a receiver, throwing where he’ll be, not where he is.
| Technique | What It Does | Common Use |
| Fingers parallel to head | Even length | Uniform layers |
| Fingers angled away | Length increases one direction | Graduated shapes |
| Over-direction back | Longer toward the face | Framing fringe |
| Over-direction forward | Longer toward the back | Swept-back styles |
| Point cutting | Softens hard lines | Textured finishes |
Angles shape each section. Proportion ties the sections together.
Proportion Between Top, Sides and Back
The Ratio of Top to Sides
One of the most useful ideas I share with clients is the ratio between top length and side length. It’s not a fixed rule, but it’s a helpful guide.
| Style | Top Length | Side Length | Approximate Ratio | Overall Feel |
| Buzz cut | 1/4 inch | 1/4 inch | 1:1 | Uniform, minimal |
| Crew cut | 1 inch | 1/4 inch | 4:1 | Clean, classic |
| Ivy League | 1.5 inches | 3/8 inch | 4:1 | Polished, professional |
| Textured crop | 2 inches | Skin to 1/4 inch | 8:1 or more | Modern, bold |
| Pompadour | 3 to 4 inches | 1/8 to 1/4 inch | 12:1 or more | Dramatic, high contrast |
A higher ratio means more contrast and drama. A lower ratio means more harmony and subtlety. Neither is “correct.” It depends on your face, your job, and how much time you want to spend in front of the mirror.
Low Fade vs. High Fade as a Proportion Tool
| Factor | Low Fade | High Fade |
| Where it starts | Just above the ear | Near the temples or parietal ridge |
| Effect on head shape | Keeps width | Slims and lengthens |
| Best face shapes | Oblong, oval, narrow | Round, square, wide |
| Professional fit | Very conservative | Bold |
| Grow-out | Gentle | Shows quickly |
A high fade shifts visual weight upward, making the top look taller. A low fade keeps weight lower, making the head look fuller at the sides.
Height vs. Width
Height and width work against each other. Add height, and the face looks longer. Add width at the sides, and it looks shorter and broader.
It reminds me of adjusting a picture on the wall. Every nudge one way changes how everything else in the room looks. The question isn’t “how much height?” but “how much height for this face?”
Where the Beard Joins the Equation
A beard changes the whole geometry. It adds weight to the lower third of the face, which means the hair on top often needs to balance it.
A full beard with tight sides and a short top can look bottom-heavy. A full beard with some height on top looks more even, like a well-built sandwich with bread on both sides. When a client has a beard, I always step back and look at the whole head, from crown to chin, as one shape.
Of course, all these numbers shift once real hair texture enters the picture.
How Hair Texture Bends the Rules
Straight Hair and the Honest Line
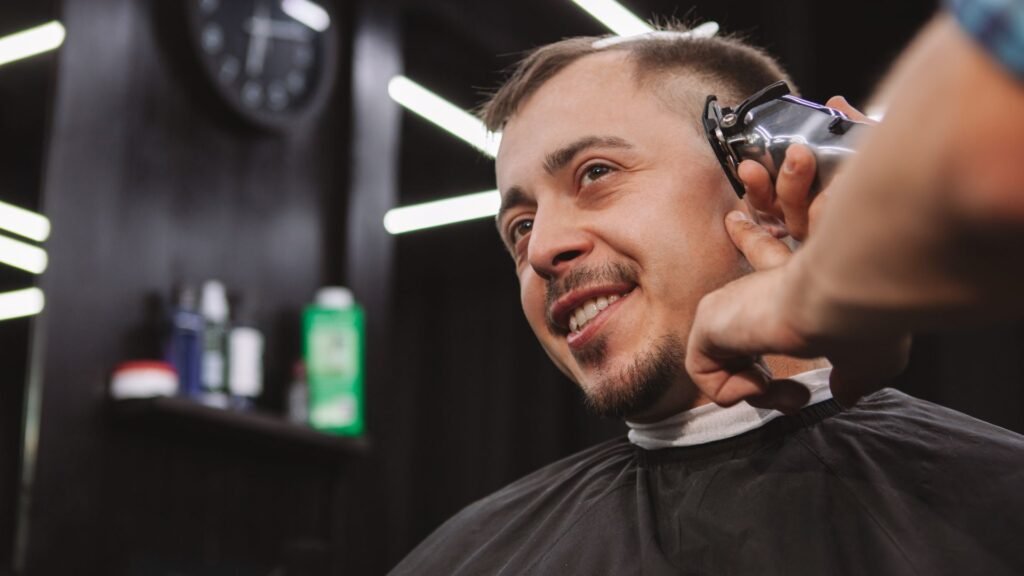
Straight hair is honest. It shows every line, every angle, every step in the blend. That’s both a blessing and a challenge.
With straight hair, a precise geometric shape looks crisp and sharp. But any small mistake is easy to spot. I usually cut straight hair with extra care in the transitions, checking each section twice.
Waves, Curls and Coils
Curly and coily hair changes the geometry completely, mainly because of shrinkage. A curl that measures three inches stretched might sit at just one inch when dry.
| Hair Type | Geometric Challenge | Best Approach |
| Straight, fine | Shows every line | Precise blending, soft edges |
| Straight, coarse | Sticks out at the sides | Remove bulk, tight sides |
| Wavy | Wave pattern shifts shape | Cut dry, check movement |
| Curly | Shrinkage changes length | Cut dry, shape the silhouette |
| Coily | Needs even sculpting | Shape the outline from every side |
Clarence Robbins, in his textbook Chemical and Physical Behavior of Human Hair, notes that hair can absorb roughly 30 percent of its weight in water. That swelling is part of why a curly cut looks so different wet and dry.
With coily hair, I often think like a sculptor. The goal is a clean, rounded silhouette, so I’ll turn the chair again and again, checking the outline against the light.
Density, Thickness and Growth Direction
Density is how many hairs grow per square inch. Thickness is how wide each strand is. The American Academy of Dermatology notes that the average scalp holds around 100,000 hairs, but that number varies a lot from person to person.
Dense hair can make a shape look bulky, so it often needs thinning. Fine, sparse hair needs weight left in to look full. Then there’s growth direction: cowlicks and whorls that push hair one way or another. Geneticist Amar Klar’s 2003 research found that clockwise crown whorls are far more common than counterclockwise ones. Working with that spiral, rather than against it, makes the whole shape sit more naturally.
With all this in mind, let’s walk through how a cut actually comes together.
Geometry in Action: Building a Cut Step by Step
Consultation and Mapping
Every cut I do starts with a conversation. What do you do for work? How much time do you spend styling? Do you wear a hat or helmet? Then I run my fingers across your scalp, feeling for ridges, flat spots, and whorls.
It’s a bit like a coach watching game film before practice. You want to know the terrain before you make the plan.
Setting the Guideline
The guideline is the first cut, and every other section follows it. Here’s a simplified version of how a classic tapered cut comes together:
- Section the hair into top, sides, back, and crown
- Set the perimeter guideline around the ears and neckline
- Build the taper in the back using graduation
- Match the sides to the guideline
- Connect the top to the sides at the parietal ridge
- Blend any visible lines
- Texturize to remove bulk where needed
- Detail the outline
Set the first board straight, and the whole deck goes down true.
Cross-Checking: Wet vs. Dry
Cross-checking means checking the cut in the opposite direction from how it was cut. If I cut vertically, I check horizontally.
| Factor | Wet Cross-Check | Dry Cross-Check |
| Reveals exact lengths | Yes | Less precisely |
| Shows true shape | No, hair clumps together | Yes |
| Shows growth patterns | Partly | Fully |
| Accuracy on curls | Low | High |
| Catches bulk | Rarely | Usually |
I usually check both ways. Wet tells me the lines are clean. Dry tells me whether the shape actually belongs on that head.
Detailing the Outline
The outline, around the ears, sideburns, and neckline, is the frame of the picture. I use trimmers for clean edges, then check both sides against each other from the front.
Is the neckline curved, square, or tapered? Do the sideburns end at the same point? Small things, but they’re the finishing strokes. When I brush off the loose hair and dust the neck with talc, the shape should look settled from every side.
The process relies on skill, but it also leans on the right tools.
The Tools of Precision
Clippers vs. Shears
| Factor | Clippers | Shears |
| Speed | Fast | Slower |
| Consistency | Very even with guards | Depends on skill |
| Best for | Fades, short sides, uniform lengths | Medium lengths, texture, contours |
| Following head shape | Limited by guard | Adjusts to every curve |
| Sound | The familiar buzz | The quiet snip of steel |
| Feel | Vibration on the scalp | Cool blade near the ear |
Clippers give consistency. Shears give control. On a bumpy head, I often switch to scissor-over-comb so I can follow every curve.
Guards and the Math of Millimeters
Clipper guards are geometry made simple. Each number creates a set length. Sizes vary slightly by brand, but here’s a common guide:
| Guard Number | Approximate Length | Common Use |
| #0 (no guard) | About 1/16 inch | Skin fade base |
| #1 | 1/8 inch | Tight fades |
| #2 | 1/4 inch | Short sides |
| #3 | 3/8 inch | Medium sides |
| #4 | 1/2 inch | Longer sides, short tops |
| #5 | 5/8 inch | Soft blending |
| #6 | 3/4 inch | Short tops |
| #8 | 1 inch | Longer tops |
A fade is really just a staircase of these lengths, blended smoothly so you can’t see the steps.
Combs, Mirrors and Light
A wide-tooth comb lifts hair for scissor work. A fine-tooth comb checks precision. And the humble hand mirror? It’s how I see angles I’d otherwise miss.
Lighting matters too. Bright, even overhead light reveals uneven blending. Dim light hides it until you step outside. I once had a client say his cut looked perfect in the shop and completely different in his car’s rearview mirror. Perhaps the light just told a different story.
Even with good tools, mistakes happen. Here are the ones I see most.
Geometry Mistakes Worth Avoiding
Lines That Fight the Head
The most common mistake is placing a line where the head doesn’t want it. A fade line on the occipital bone. A weight line right at the widest point. A blocked neckline over uneven growth.
| Mistake | What You’ll Notice | The Fix |
| Fade line on the occipital bone | Shelf at the back | Blend above or below the bump |
| Weight line at the widest point | Head looks boxy | Raise or lower the weight line |
| Blocked neckline on crooked growth | Uneven edge | Switch to a taper |
| Same guard over a flat spot | Back looks scooped | Leave more length there |
| Cutting against a cowlick | Hair flips up | Leave length to weigh it down |
| Mismatched sideburns | Lopsided face | Check from the front, not just the ears |
Copying a Photo Without Translating It
Clients often bring photos, and I love that. But a photo shows a style on someone else’s head. Different skull, different texture, different face.
I noticed that the best results come when we treat the photo like a recipe rather than a blueprint. We keep the main idea, then adjust the ingredients for your head. It’s like a father teaching his son a family recipe. The son makes it his own over time, and it still tastes like home.
Forgetting the Grow-Out
A cut that looks perfect on day one but falls apart by week two isn’t really a great cut. Good geometry plans for growth.
The American Academy of Dermatology notes that hair grows about half an inch a month. On a skin fade, that’s a big change. On a longer scissor cut, it’s barely noticeable. Thinking ahead means choosing shapes that grow out gracefully.
Mistakes teach lessons. So do the people in the chair.
Stories From the Chair
The Lawyer With the Long Face
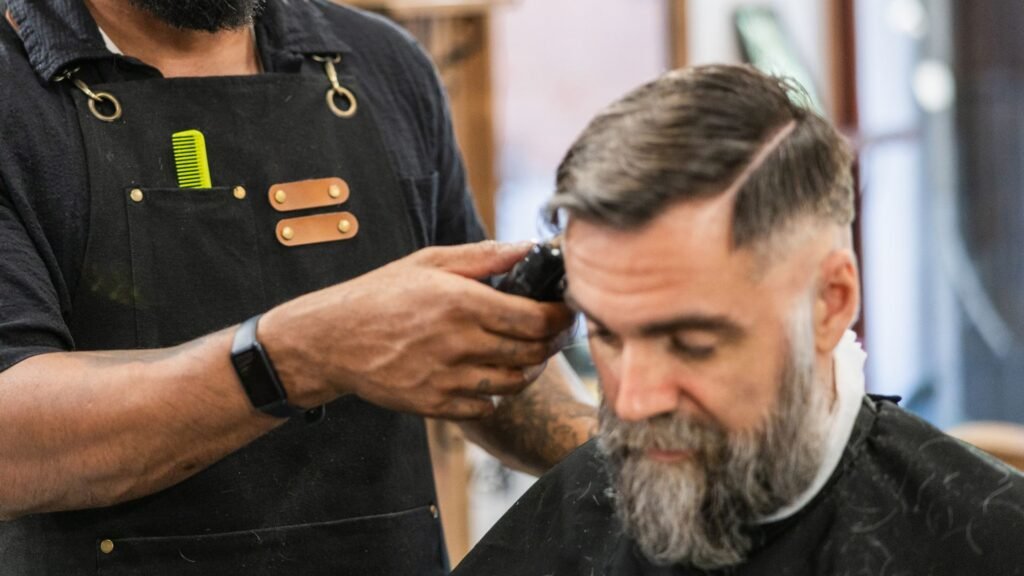
James was a trial lawyer with a long, narrow face. For years, he’d asked for a tall pompadour because he’d seen it in a magazine. It made his face look even longer.
We talked it over. I suggested lowering the height, adding a soft side-swept fringe, and leaving the sides slightly fuller. He was unsure. “Won’t I look less sharp?”
A month later, he came back grinning. “My wife said I look rested,” he said. “I didn’t change anything but my hair.” Sometimes geometry works quietly like that.
The Father and Son on Saturday Morning
A dad brought in his ten-year-old son. Both wanted the same textured crop. On paper, they had the same style. On their heads, they needed different geometry.
The dad had a round face and a strong crown whorl, so I added a little more height on top and kept the sides tighter. The boy had a narrow head and a flat spot at the back, so I left more length behind to fill it. When they stood side by side, they looked like a matching set, both proud as could be.
The Linebacker and the Helmet
A college linebacker came in needing a cut that would survive practice. Helmets flatten the top and push hair against the sides.
We chose a high fade with about an inch on top, cut at 90 degrees so it would sit evenly after hours under a helmet. He came back two weeks later. “Still looks good after practice,” he said, almost surprised. Geometry built for real life tends to hold up.
Good stories often lead to practical questions about cost and upkeep.
Cost, Value and Keeping Your Shape
What Precision Costs
| Service Type | Typical Time | Common Price Range | What You’re Paying For |
| Basic clipper cut | 15 to 25 minutes | $20 to $35 | Uniform length |
| Standard cut with blending | 30 to 45 minutes | $30 to $50 | Balanced sides and back |
| Precision fade | 40 to 60 minutes | $40 to $65 | Seamless gradients |
| Scissor cut with texture | 45 to 60 minutes | $45 to $70 | Contour shaping |
| Cut with beard sculpting | 50 to 75 minutes | $55 to $90 | Full head and face geometry |
Prices vary by city, skill, and experience. The U.S. Bureau of Labor Statistics projects continued growth in demand for barbers and stylists through the early 2030s, which suggests more men see skilled service as worth the investment.
Precision Cut vs. Budget Cut
| Factor | Precision Cut | Budget Cut |
| Consultation | Detailed | Brief or none |
| Head mapping | Yes | Rarely |
| Cross-checking | Standard practice | Often skipped |
| Grow-out | Graceful | Shape fades faster |
| Cost per visit | Higher | Lower |
| Visits needed | Fewer emergency fixes | More frequent corrections |
Perhaps the real question isn’t “what does it cost?” but “how long does it look right?” A $40 cut that holds shape for four weeks may cost less, in the long run, than a $20 cut that needs fixing after ten days.
How Geometry Grows Out
| Weeks After the Cut | What Happens | Shape Status |
| Week 1 | Crisp lines, sharp angles | Fresh |
| Week 2 | Fade softens, neckline fills | Still balanced |
| Week 3 | Sides widen, weight shifts upward | Starting to drift |
| Week 4 | Weight line blurs, edges fuzzy | Noticeably off |
| Week 5 and beyond | Geometry lost | Time for a visit |
Where Geometric Styles Are Heading
Lately, I’ve noticed a shift toward softer geometry. Textured crops, modern mullets, burst fades, and natural curls are everywhere. They look relaxed, but they still rely on careful structure underneath.
The American Hair Loss Association reports that about two-thirds of American men experience some noticeable hair loss by age 35. That’s part of why many men are choosing shorter, textured shapes that disguise thinning. Good geometry can’t stop hair loss, but it can work around it beautifully.
Now let’s turn to the questions I hear most often.
Frequently Asked Questions
What does “geometry” actually mean in a haircut?
It means the shapes, lines, and angles that make up your cut. Every time a barber lifts hair to a certain angle or cuts a certain line, they’re making a geometric choice. Those choices decide where weight sits, how the cut frames your face, and how it grows out.
Do I need a perfectly symmetrical cut?
Not usually. Most heads aren’t perfectly even, so exact symmetry can actually highlight small differences. Informal balance, where both sides feel equal even if they’re cut differently, often looks more natural.
How do I know my face shape?
Pull your hair back and look straight into a mirror. Compare your forehead, cheekbones, and jaw widths, then compare overall width to length. Or simply ask your barber. Most can tell within a few seconds.
What Changes When It’s a Child’s Haircut?
Kids’ heads are proportionally larger than adults’, their faces are still developing, and they tend to wiggle. Simple, forgiving shapes usually work best, such as soft tapers, rounded corners, and enough length to hide small imperfections. It also helps to keep the session short and calm.
Should I bring a photo to my appointment?
Yes, but be open to adjustments. A photo shows the general idea, while your barber will adapt it to your head shape, texture, and face. Think of it as a starting point for conversation.
Why does my cut look different after a week?
Hair grows roughly half an inch a month, so short areas change shape quickly. Fades soften, sides widen, and the weight line blurs. A shape planned with grow-out in mind will drift more gracefully.
Is a high fade or low fade better for my face?
High fades slim and lengthen, which suits round and square faces. Low fades keep width, which suits narrow and oblong faces. Your job, routine, and personal taste matter too.
How often should I get a trim to keep the geometry sharp?
Skin fades typically need attention every two to three weeks. Classic tapers last three to four weeks. Longer scissor cuts often go four to six weeks.
Let’s bring everything together into something you can use.
Your Geometry Checklist and a Final Word
Before You Sit Down
- Take photos of the front, sides, and back of your current cut
- Notice where your hair feels heavy or sticks out
- Feel for bumps, flat spots, and your crown whorl
- Think about your face shape
- Bring a reference photo, if you have one
- Mention your job, hobbies, and any hats or helmets
- Ask how the cut will grow out
- Book your next visit before leaving
A Simple Home Check
| Angle | What to Look For | How to Check |
| Front | Even sides, matching sideburns | Stand straight in the mirror |
| Left and right sides | Smooth weight line, clean fade | Hand mirror and phone photos |
| Back | No shelf, clean neckline | Two mirrors or a photo |
| Crown | No gaps or flips | Hand mirror from behind |
| Top | Even length, straight part | Photo from above |
| Three-quarter | Smooth flow front to side | Angled phone photo |
A Final Word From the Chair
I still think about Dev and his crumpled receipt. That lopsided oval with its scribbled bump was, in its own way, a pretty good blueprint. He just needed someone to read it with him.
Geometry isn’t about turning your head into a math problem. It’s about noticing. Noticing where the weight sits. Noticing how a line can lengthen your face or soften your jaw. Noticing how the curve of your skull asks for a certain kind of care.
Next time you’re in the chair, with the buzz of clippers near your ear and the warmth of a hot towel still lingering on your neck, perhaps watch how your barber steps back, tilts his head, and studies the shape. What is he seeing? What angle is he weighing? You might find the whole experience feels a little different once you know the language.
If any of this rings true for you, take it with you. If it doesn’t quite fit, that’s fine too. Every head tells its own story, and after all these years behind the chair, I’m still learning to read each one.