
Same Cut, Two Heads, Two Very Different Results
The Tale of Two Crew Cuts
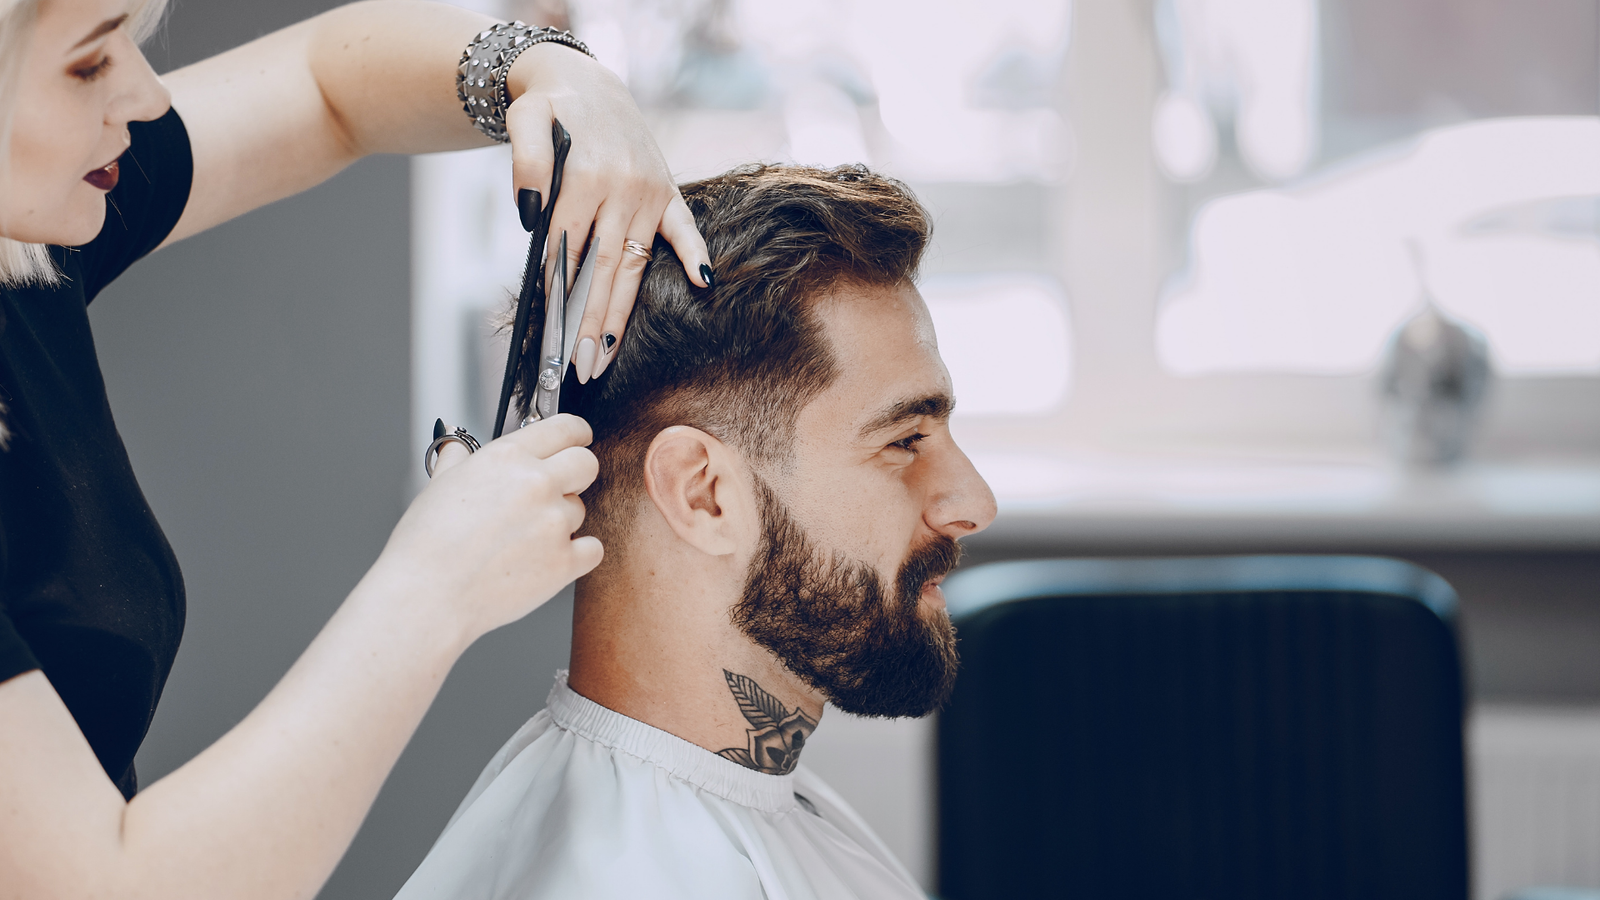
A few Saturdays back, two brothers came into the shop together. Same parents, same jawline, same laugh that fills the room. They both held up their phones with the same photo: a clean crew cut, short on the sides, a little length up top, brushed slightly forward.
The clippers buzzed through the first brother’s sides like a lawnmower through thick spring grass. His hair was packed in tight, so many strands per inch that the comb almost stood up on its own. The second brother sat down next, and the same guard on the same clipper showed a hint of scalp near his crown. His hair was soft, fine, and spread a little further apart.
Same photo. Same cut on paper. But if I had finished them the same way, one would have walked out looking sharp and the other looking thin and patchy. So I didn’t. I thinned out the first brother’s top until it moved. For the second, I put the thinning shears away completely, kept a blunter line on top, and left a touch more length at the crown.
When they stood side by side at the mirror, talc still on their necks, they looked like brothers wearing the same haircut. That’s the whole point. It just took two different finishes to get there.
Density Is the Quiet Variable
Most men think of their hair in simple terms: straight or curly, short or long, maybe “thick” or “thin.” Very few think about density, which is simply how many hairs grow from each patch of your scalp.
Yet density quietly decides so much. It decides whether thinning shears help or hurt. It decides how short your sides can go before the scalp shows. It decides how much product you need, which edges look crisp, and whether your hair puffs out by week two or lies down like a well-trained dog.
I noticed early in my career that the cuts that disappointed people rarely failed in the big shape. They usually failed in the finish. The cutting was fine; the finishing simply didn’t respect how much hair was actually there.
What You’ll Start Noticing
This guide isn’t meant to turn you into a stylist. It’s meant to help you notice a few things about your own hair that you may have walked past for years. By the end, you’ll understand:
- What density really is, and how it differs from thickness and texture
- The science behind why some heads grow more hair than others
- How finishing changes for low, medium, and high density
- Which tools and techniques suit each density, and which ones backfire
- How edges, product, and blow-drying should change with your hair
- What it costs to maintain each density, and where trends are heading
Perhaps the best place to begin is with a clear definition, because a lot of confusion lives in the words we use.
What Hair Density Really Means
Density, Thickness, and Texture Are Not the Same Thing
Men use the word “thick” to describe three very different things, and that’s where many finishing mistakes start.
Density is how many hairs grow per square centimeter of scalp. It’s a count.
Thickness, or diameter, is how wide each individual strand is. Fine hair is narrow; coarse hair is wide. According to Clarence Robbins’ textbook Chemical and Physical Behavior of Human Hair, scalp hair fibers typically range from about 40 to 120 micrometers across. That’s a threefold difference in width from one person to the next.
Texture, in everyday shop talk, usually means the shape of the strand: straight, wavy, curly, or coily.
You can have high density with fine strands, which looks full but collapses easily. You can have low density with coarse strands, which feels rough to the touch but shows scalp under bright light. Each combination asks for a different finish.
| Term | What It Measures | How It Feels or Looks | Example |
| Density | Number of hairs per square centimeter | Full vs. see-through | “I can’t see your scalp at all.” |
| Thickness (diameter) | Width of each strand | Fine and silky vs. coarse and wiry | “Each hair feels like fishing line.” |
| Texture (pattern) | Shape of each strand | Straight, wavy, curly, coily | “It springs back when I pull it.” |
| Porosity | How easily hair absorbs moisture | Dries fast vs. stays damp | “It soaks up product instantly.” |
When a client tells me his hair is “thick,” I usually ask a follow-up question: “Do you mean there’s a lot of it, or that each hair feels heavy?” The answer changes how I finish the cut.
How Density Gets Measured, in the Clinic and in the Chair
In a dermatology clinic, density can be measured precisely with a magnifying tool called a trichoscope, which lets doctors count hairs in a small marked area. Dermatology research generally places average scalp density somewhere around 200 hairs per square centimeter, though the range from person to person is wide.
In the chair, we use simpler tests:
- The part test. Part the hair down the middle. A wide, clearly visible scalp line suggests lower density. A thin line that disappears quickly suggests higher density.
- The comb drag. Run a fine-tooth comb through a section. Dense hair resists and fills the teeth. Sparse hair slips through with little drag.
- The light check. Under the bright overhead lamp, look at the crown. If you can see scalp easily when the hair is dry, density in that zone is likely lower.
- The guard test. Run a clipper with a #2 guard up the side. Dense hair still looks solid. Lower density may already show skin.
None of these are lab-grade, but after twenty-plus years, your fingers start counting without you asking them to.
Low, Medium, and High Density at a Glance
| Density Level | Scalp Visibility (Dry) | Feel in the Hand | Common Finishing Approach |
| Low | Visible, especially at part and crown | Light, airy, little resistance | Keep weight, minimal thinning, blunt or softly textured ends |
| Medium | Slightly visible at the part | Balanced, moves freely | Moderate texturizing, flexible styles |
| High | Rarely visible | Heavy, packed, comb resists | Debulking, channel cutting, strong texturizing |
It seems simple once it’s laid out like this. Still, people have been wrestling with these differences for a very long time, long before anyone had a word for density.
How Cutters Have Handled Density Through the Years
Straight Razors and Patient Scissor Work
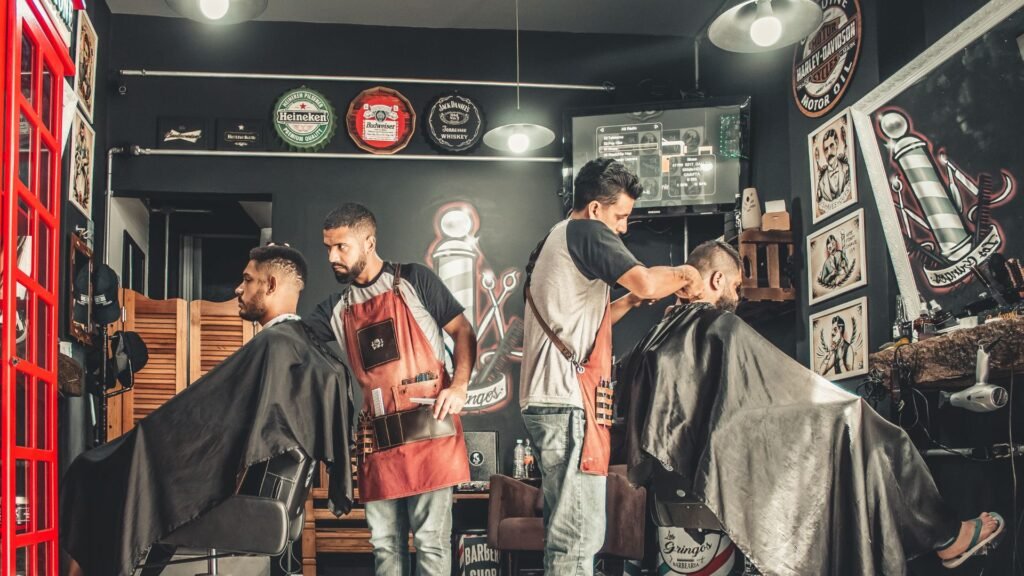
My first mentor was an old barber with forearms like bridge cables and a soft voice that never rose above the radio. He had no thinning shears for most of his early career. When a man came in with a heavy head of hair, he removed bulk the slow way: scissor-over-comb, layer by layer, and sometimes a straight razor drawn lightly along the hair to soften the ends.
I remember watching him take nearly an hour on a dense head. He’d hum along to whatever was playing, lift a section, snip, check, and lift again. “You don’t fight a thick head,” he told me once. “You talk it down.”
For fine, sparse hair, his approach was the opposite. He’d cut cleaner, blunter lines and leave more weight. He didn’t call it density management. He just watched how hair behaved and responded to it.
Clippers, Thinning Shears, and the Modern Kit
Hand-operated clippers were developed in the late 1800s, and electric clippers arrived in the early twentieth century. Leo J. Wahl patented an electric clipper design around 1919, and companies like Andis and Oster soon followed. Suddenly, sides and backs could be cut short and even in minutes.
Thinning shears, with one toothed blade and one straight blade, became a common tool through the middle of the century. They made removing bulk faster, which was a gift for dense hair. They also made it much easier to overdo it on fine hair, a problem we’re still cleaning up today.
From the Flattop to the Textured Crop
| Era | Signature Style | How Density Was Handled | Who Benefited Most |
| 1920s to 1940s | Slick side parts, short back and sides | Heavy pomade masked density differences | Medium to high density |
| 1950s | Flattop, crew cut, pompadour | Clippers and wax built structure | High density |
| 1960s | Longer mod and Ivy League cuts | Scissor layering for shape | Medium density |
| 1970s | Feathered, layered, longer | Razor cutting and blow-drying | High density with fine strands |
| 1980s | Hi-top fade, mullet, volume | Sculpting tall shapes from dense hair | High density, coily textures |
| 1990s | Caesar, curtains, buzz cuts | Short uniform lengths minimized differences | Low density looked great short |
| 2000s | Faux hawk, spiky texture | Point cutting and heavy product | Medium density |
| 2010s | Skin fades, undercuts, pompadours | Undercuts removed bulk from dense sides | High density |
| 2020s | Textured crops, mullets, natural curls | Texturizing tailored to density zones | All densities, when finished well |
Looking back, I noticed that every popular style seems to flatter one type of head more than others. The good news is that modern finishing gives us far more ways to adapt. But to adapt well, it helps to understand why density varies in the first place.
The Science Behind Why Density Varies
Your Follicle Count Is Set Early
Each hair grows from a follicle, a tiny pocket in the skin. Most of the follicles you’ll ever have are formed before you’re born. The American Academy of Dermatology notes that the average scalp holds roughly 100,000 hairs, and that shedding 50 to 100 a day is normal.
Genetics decide much of your starting count. That’s why the brothers in the earlier story could share a face and still have very different heads of hair. Genes don’t always hand out traits evenly, a bit like two kids growing up in the same house with completely different taste in music.
Density Shifts With Age
Density isn’t fixed for life. Follicles can shrink over time in a process called miniaturization, especially in men with androgenetic alopecia, the common male pattern of thinning. According to the American Hair Loss Association, about two-thirds of American men experience some noticeable hair loss by age 35, and roughly 85 percent have significantly thinner hair by age 50.
The way doctors describe this pattern also has history. Dr. James Hamilton published a classification scale in 1951, and Dr. O’Tar Norwood refined it in 1975 into the Norwood scale still used today.
| Age Range | Typical Density Pattern | Common Finishing Focus |
| Teens | Usually at peak density | Debulking, managing volume and cowlicks |
| 20s | Peak or early changes at temples | Texturizing, watching hairline shape |
| 30s | Temples and crown may thin | Strategic weight, softer lineups |
| 40s | More visible crown or frontal thinning | Shorter tops, matte finishes |
| 50s and beyond | Lower overall density for many | Close crops, clean edges, minimal thinning |
These changes can feel personal. Many men sit down quietly hoping I won’t mention their crown. I rarely bring it up unless they do. Perhaps that’s one of the gentlest things we can do from behind the chair: adapt the finish without making a man feel examined.
Density Across Hair Types and Heritage
Density also varies across populations. A 2001 study published in the British Journal of Dermatology by researcher Geneviève Loussouarn found that African hair tended to have lower average density than Caucasian hair, roughly 190 versus around 230 hairs per square centimeter in that sample. Asian hair often has wider, rounder strands with moderate density.
Here’s the interesting part: because tightly coiled hair stacks and overlaps, a head with lower measured density can look fuller than a straight-haired head with more strands. Density is the count, but curl changes how that count shows up in the mirror.
| Hair Category | Typical Strand Shape | Density Tendency | Visual Fullness | Finishing Note |
| Straight, fine | Round, narrow | Varies widely | Can look sparse | Minimal thinning, blunt ends |
| Straight, coarse | Round, wide | Moderate | Looks full | Moderate debulking |
| Wavy | Slightly oval | Moderate to high | Full with movement | Texturize to release waves |
| Curly | Oval | Moderate | Very full due to volume | Shape dry, avoid over-thinning |
| Coily | Flat, elliptical | Often lower count | Looks densest of all | Sculpt and shape, rarely thin |
All this science leads to one practical question: what exactly happens at the end of a cut that should change based on density?
What “Finishing” a Haircut Actually Involves
The Last Ten Percent That Decides Everything
Think of building a house. The foundation, framing, and roof take most of the time. But the trim, paint, and doorknobs decide whether it feels like home. Finishing a haircut is that trim work.
The bulk of the cut sets the shape: the fade, the length on top, the outline. Finishing is everything after: removing weight, refining texture, crisping edges, checking balance, blow-drying, and applying product. It’s often the last ten minutes, but it shapes how the cut looks for the next three weeks.
Weight, Texture, and Edges: The Three Finishing Jobs
Finishing usually comes down to three jobs:
- Weight. How much bulk is left inside the hair, which decides whether it lies flat, stands up, or puffs out.
- Texture. How the ends behave, whether they sit as a solid line or break into separated, piecey strands.
- Edges. The neckline, around the ears, sideburns, and front hairline.
Haircut balance is what happens when all three suit the head they sit on. On a dense head, balance usually means taking weight out. On a sparse head, it usually means protecting weight and keeping edges soft enough not to draw attention to thin spots. The same three jobs, approached from opposite directions.
Dry Check vs. Wet Check
Many cutters work wet, then finish dry. Density makes that final dry check more important, because wet hair clumps together and hides both bulk and gaps.
| Factor | Wet Check | Dry Check |
| Shows true bulk | No, hair clumps together | Yes, hair spreads naturally |
| Reveals scalp in low-density areas | Exaggerates it | Shows realistic coverage |
| Accuracy for curly hair | Low, shrinkage hides final length | High |
| Best for | Precise lines and structure | Texture, weight, and balance |
| Risk if skipped | Lines may wander | Bulk or gaps surprise you later |
I almost always finish with a dry check. I’ll blow-dry, step back, look at the silhouette in the mirror, and ask myself a quiet question: does this shape belong on this head? Sometimes the answer means picking the shears back up.
With the idea of finishing laid out, let’s look at how it changes for each density, starting with the heads that have the least to spare.
Finishing Low-Density Hair: Protect Every Strand
Keep the Weight Where It Counts
When hair is sparse, every strand is doing a job. Removing bulk might seem like a way to make it lighter and more modern, but on low-density hair it usually just exposes more scalp.
So the first rule is restraint. I leave weight where coverage matters most: the crown, the front hairline, and the top of the head where light hits. I might remove a little bulk from the sides if they’re unusually full compared to the top, which helps the top look fuller by contrast.
It’s a bit like a coach managing a short bench. When you only have seven players, you don’t sit your starters for long.
Blunt Ends vs. Texturized Ends
Blunt ends create a solid edge. That edge holds more visual weight and makes hair look denser. Texturized ends separate into pieces, which can look stylish on full hair but show gaps on sparse hair.
| Factor | Blunt Ends | Texturized Ends |
| Visual density | Looks thicker | Looks lighter and airier |
| Scalp visibility | Less | More |
| Movement | Moves as a unit | Moves in separate pieces |
| Best for | Low density, fine hair | High density, coarse hair |
| Day-to-day styling | Simple, predictable | Needs product for definition |
| Risk on low density | Can look a little heavy | Can look thin or stringy |
For many low-density clients, I land somewhere in between: a mostly blunt line with very light point cutting just to soften it, so the hair doesn’t look like it was cut with a ruler.
Why Shorter Often Looks Fuller
This surprises a lot of men. Longer hair on a sparse head tends to separate and fall apart, revealing the scalp underneath. Shorter hair stands up more and covers more evenly.
A close textured crop or a short Caesar with a slightly forward fringe can make low-density hair look fuller than a longer side part ever could. Shorter sides also reduce the contrast between full sides and a thinner top.
I noticed that men often resist this at first. Going shorter can feel like giving up. But perhaps it’s closer to choosing the right tool for the job.
Styling That Builds the Look of Fullness
For low density, the finish should add grip and lift without weight:
- A light mist of sea salt spray or a volumizing pre-styler on damp hair
- A blow-dry with lift at the roots
- A small amount of matte clay or texture powder on dry hair
- No heavy oils, no shiny pomades, no thick creams
Shine reflects light, and light reveals scalp. Matte finishes absorb light, which makes hair look denser. It’s the same reason a dark matte truck looks heavier than a shiny one in the same color.
Now let’s flip to the opposite end of the scale, where the challenge isn’t too little hair but far too much.
Finishing High-Density Hair: Lighten the Load
Debulking Without Losing the Shape
Dense hair is a blessing that sometimes feels like a burden. It grows out fast, puffs up at the sides, and turns into a helmet within weeks if nobody takes weight out. The finishing job here is debulking: removing interior bulk while keeping the outer shape and length.
The trick is to remove weight from inside the hair rather than from the surface. Cut too much from the top layer, and you’ll see choppy holes. Remove it underneath and between sections, and the hair falls smoother and lighter.
Thinning Shears vs. Point Cutting
| Factor | Thinning Shears | Point Cutting |
| Speed | Fast | Slower |
| Precision | Moderate | High |
| Effect on ends | Removes random strands at the cut point | Creates soft, piecey ends |
| Best density | High | Medium to high |
| Risk | Frizz and short sprouting hairs if overused | Uneven ends if rushed |
| Best for | Overall weight removal | Texture and detail |
I often use both on a dense head. Thinning shears take out the bulk underneath, then point cutting along the ends gives the top definition. Using thinning shears alone, especially close to the scalp, can leave short hairs that poke up like little fence posts a week later.
Channel Cutting and Hidden Weight Removal
Channel cutting is a technique where I cut small, hidden channels of shorter hair inside a section. The longer hair on top lies down into those channels, which flattens bulk without changing the outer shape.
Think of it like taking a few bricks out of the inside of a wall without anyone seeing from the street. The wall still stands, just lighter. For very dense, straight hair that sticks up, this can be the difference between hair that obeys and hair that rebels.
Keeping the Sides From Swelling
Dense hair swells most at the sides above the ears, where the head is widest. As it grows, it pushes outward and makes the head look boxy.
Finishing options for dense sides include:
- Tighter fades or tapers that remove bulk with the clippers
- An undercut where the lower sides are cut short beneath longer hair
- Scissor-over-comb thinning to blend weight smoothly
- Point cutting along the weight line so it doesn’t form a shelf
Between the extremes sits the largest group of men, and their hair offers more choices than either end of the scale.
Finishing Medium-Density Hair: The Flexible Middle
Why Medium Density Gives You Options
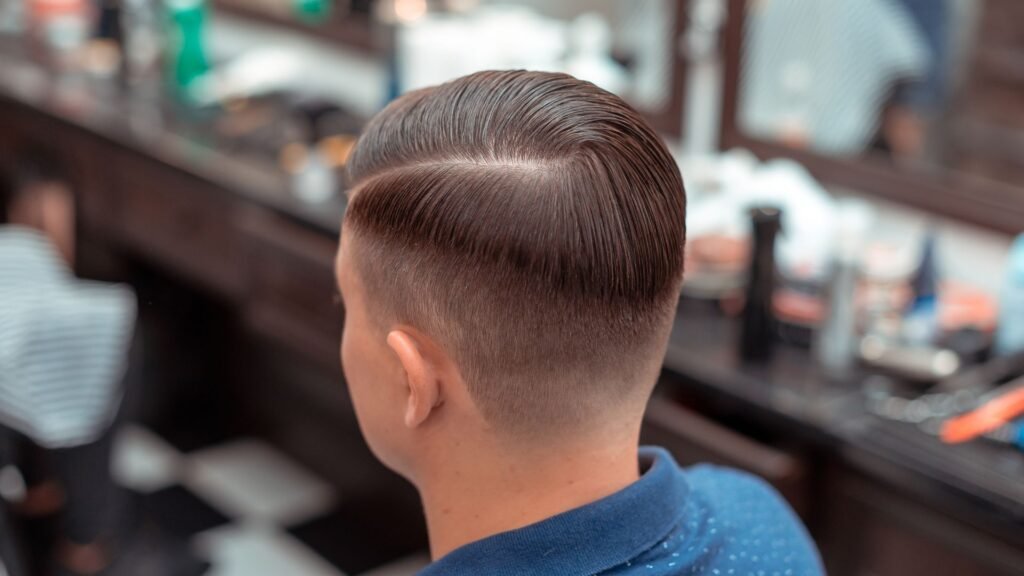
Medium density is the comfortable middle of the road. There’s enough hair to cover the scalp, but not so much that it fights you. Most styles, from side parts to textured crops to short quiffs, can work.
That flexibility is a gift, but it can also lead to lazy finishing. Because medium hair looks fine with almost any cut, it’s easy to skip the details that would make it look great.
When to Add Texture and When to Leave It Alone
| Goal | Add Texture? | Finishing Approach |
| Messy, lived-in look | Yes | Point cutting, light thinning, matte clay |
| Classic polished side part | Little | Blunter ends, light cream or water-based pomade |
| More volume on top | Some | Point cut ends, blow-dry lift |
| Hair lies too flat | Yes | Remove a little weight at the roots |
| Hair puffs at sides | At sides only | Taper or light thinning above ears |
| Longer flow style | Some | Slide cutting for movement |
I usually ask medium-density clients how much time they spend styling each morning. A man who spends thirty seconds wants a finish that falls into place. A man who enjoys five minutes with a blow dryer can handle more texture.
The Mixed-Density Head
Here’s something many people never realize: most heads aren’t one density. Density often varies across zones.
| Zone | Common Density Pattern | Finishing Approach |
| Front hairline | Can thin at temples | Soft edges, avoid harsh lineups |
| Top | Often medium or high | Texturize based on local density |
| Crown | Frequently lower | Leave weight, avoid thinning |
| Sides | Often densest area | Debulk or fade tighter |
| Nape | Varies | Taper to match neck growth |
A man might have dense sides and a lighter crown. Finishing that head as if it were all one density leads to puffy sides and a see-through crown at the same time. Perhaps the most useful mindset is to think of the head as a neighborhood, with each street needing slightly different care.
Density also behaves differently once curl enters the picture, and that’s where the finishing rules start to bend.
When Density Meets Curl Pattern
Wavy Hair and Hidden Bulk
Wavy hair often hides its density. On a dense, wavy head, the waves can stack on top of each other and create volume that seems to come from nowhere. Remove a little interior weight, and the waves suddenly relax and show their pattern.
I often slide cut wavy hair, gliding slightly open shears down the hair to remove weight along the length. It releases the wave without creating frizz. Heavy thinning shears, by contrast, can break the wave pattern and leave a fuzzy finish.
Curly and Coily Hair That Packs Tight
Curly and coily hair, even at a lower strand count, often looks very full because each strand takes up more space. Finishing here is less about removing weight and more about shaping.
Instead of thinning, I usually shape curls individually or sculpt the overall silhouette with clippers and shears. Thinning shears on tight curls can create frizz and uneven spring, because strands of different lengths coil differently.
| Curl Pattern | Low Density Finish | High Density Finish |
| Wavy | Minimal thinning, blunt ends | Slide cutting to release weight |
| Loose curls | Shape dry, keep length | Curl-by-curl shaping, light debulking |
| Tight curls | Sculpt, avoid thinning | Shape silhouette, remove bulk at sides |
| Coily | Even clipper shaping, soft edges | Sculpt with clippers, tapered sides |
Shrinkage Changes the Finishing Math
Curly and coily hair can shrink a lot as it dries, sometimes appearing well under half its stretched length. Cut it wet, and you may be surprised by how short it ends up.
That’s why I finish curly hair dry. I can see exactly how the density and curl stack together. It’s like tailoring a suit while the man is actually wearing it, not while it’s on a hanger.
Sponges, Brushes, and Wave Finishes
For men wearing 360 waves, twists, or sponge-textured styles, density matters too. Dense hair forms deep, defined waves more easily. Lower-density hair can still wave, but it often needs a very even, short cut and patient brushing to show the pattern.
Finishing here means cutting with the grain, using the same guard all over for evenness, and keeping the lineup clean but natural. A fresh brush, a soft durag, and a little patience can turn even moderate density into a sea of ripples.
With curl patterns covered, it’s time to look at the tools themselves and how each one suits a different density.
The Finishing Toolkit, Matched to Density
Clippers vs. Shears for the Final Pass
| Factor | Clippers | Shears |
| Speed | Fast | Slower |
| Best for | Short sides, fades, even lengths | Longer tops, texture, shaping |
| Effect on low density | Even coverage, can show scalp if too short | Preserves length and weight |
| Effect on high density | Removes bulk quickly | Better for detailed debulking |
| Blending | Excellent with guards | Excellent with scissor-over-comb |
| Finishing detail | Limited | High |
The buzz of a clipper is one of my favorite sounds, but clippers can only cut what they touch evenly. Shears let me choose exactly which strands to keep and which to remove. On low density, I lean on shears to protect weight. On high density, I use both to clear bulk quickly and then refine.
The Straight Razor: Help or Hazard?
Razor cutting creates soft, tapered ends by slicing hair at an angle. On dense, coarse, straight hair, it can remove weight beautifully and create movement.
On fine or sparse hair, though, razor cutting can make ends look wispy and thin. On curly hair, it may cause frizz. I noticed that some younger cutters reach for the razor because it looks impressive. Perhaps the better question is whether it serves the hair in front of them.
Texturizing Techniques, Ranked by Density
| Technique | Low Density | Medium Density | High Density |
| Thinning shears | Avoid or very light | Moderate | Strongly recommended |
| Point cutting | Very light | Recommended | Recommended |
| Slide cutting | Rarely | Good for longer styles | Excellent |
| Channel cutting | Avoid | Occasionally | Excellent |
| Razor cutting | Avoid | Situational | Good on straight hair |
| Blunt cutting | Recommended | Good for polished styles | Rarely alone |
| Scissor-over-comb | Good for shaping | Good | Good for blending bulk |
Tools shape the inside of a cut. The outline, though, is what people notice first.
Edges, Necklines, and Lineups
Blocked vs. Tapered Necklines
| Factor | Blocked Neckline | Tapered Neckline |
| Look | Sharp, squared edge | Soft, natural fade into skin |
| Grows out | Shows fuzz quickly | Grows out gracefully |
| Makes neck look | Wider | Slimmer and longer |
| Best for dense nape hair | Needs frequent clean-ups | Good choice |
| Best for sparse nape hair | Can look patchy | Usually the better option |
| Maintenance | Every 1 to 2 weeks | Every 3 to 4 weeks |
Dense neck hair grows back fast, so a blocked line can look fuzzy within a week. Sparse neck hair can look uneven when blocked, because gaps show along the straight edge. A taper is often kinder to both.
Lineups on Full Hairlines vs. Sparse Ones
A sharp lineup on a dense, even hairline looks clean and confident. On a thinning or uneven hairline, though, pushing the line back to make it straight can reveal more forehead and exaggerate recession.
For sparse hairlines, I follow the natural line and keep edges soft. Sometimes I’ll leave a few fine hairs in place rather than cutting a hard edge. A gentle frame often looks more natural than a perfect geometric line that doesn’t match the hair behind it.
It’s a bit like a father teaching his son to shave. You don’t carve a new face. You clean up what’s already there.
Where the Beard Meets the Sideburn
Density matters here too. Dense beards and sideburns can be faded together smoothly with clippers. Sparse beards may look patchy if faded too gradually. Sometimes a cleaner separation, or a slightly longer sideburn, gives a more even look.
A warm towel before the edge work softens the hair and calms the skin. There’s something about the steam and the smell of lather that slows the whole room down for a moment.
Once the cutting and edging are done, the finishing moves to the blow dryer and the product jar.
Blow-Dry and Product: Finishing the Finish
Heat, Direction, and Density
Blow-drying can make low-density hair look fuller by lifting the roots. For high-density hair, it helps smooth and direct bulk.
- Low density: Dry roots against their natural direction first for lift, then into place. Use medium heat.
- High density: Dry in the direction you want it to sit, using a brush to smooth volume.
- Curly hair: Use a diffuser on low heat, or let it air-dry to protect the pattern.
Robbins’ textbook notes that hair can absorb roughly 30 percent of its weight in water, which helps explain why dense hair can take so long to dry and why its shape shifts so much with humidity.
Matte vs. Shine
| Factor | Matte Finish | Shine Finish |
| Visual density | Makes hair look fuller | Can reveal scalp |
| Best density | Low to medium | Medium to high |
| Common products | Clay, paste, powder | Pomade, gel, oil |
| Style examples | Textured crops, messy quiffs | Slick-backs, side parts, waves |
| Weight on hair | Light | Medium to heavy |
| Washes out | Usually easy | Varies by formula |
How Much Product Your Density Really Needs
| Density | Product Amount | Best Products | Avoid |
| Low | Very small, less than a pea | Powder, light clay, sea salt spray | Oils, heavy pomade |
| Medium | Pea-sized | Clay, paste, light cream | Excess gel |
| High | Nickel-sized or more | Firm paste, water-based pomade, strong clay | Light sprays alone |
| Curly, any density | Varies with length | Curl cream, leave-in conditioner | Drying alcohol gels |
Even with the right products, a few finishing mistakes can quietly undo all the good work.
Finishing Mistakes Density Won’t Forgive
Over-Thinning Fine, Sparse Hair
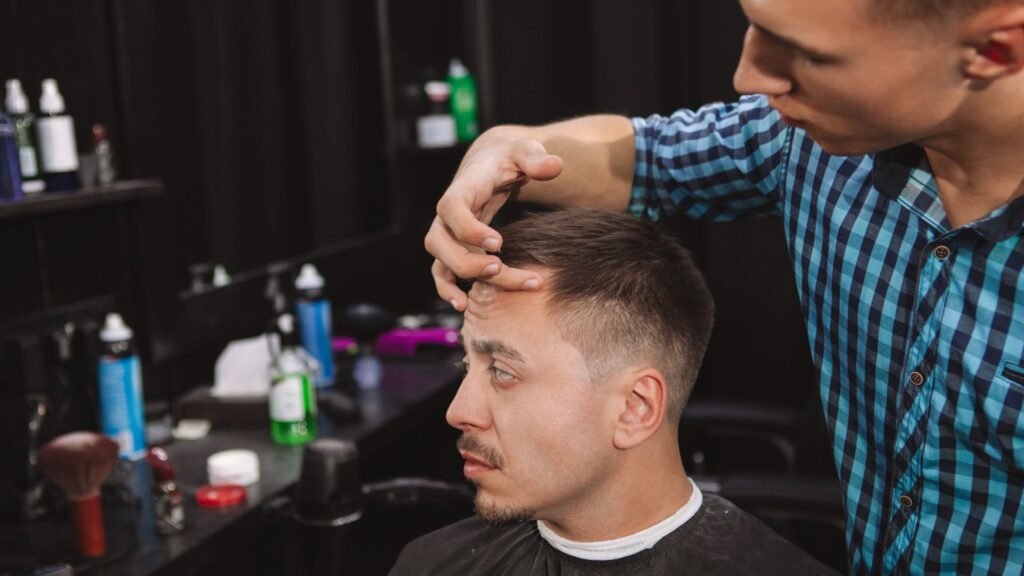
This is the mistake I see most often. A cutter treats every head the same and runs thinning shears through hair that didn’t need it. The result is a see-through top, a weak crown, and hair that never sits right.
Once hair is over-thinned, the only fix is time. Hair grows about half an inch a month, according to the American Academy of Dermatology, so recovery can take several weeks.
Leaving Dense Hair Too Heavy
The opposite mistake is just as common. A dense head gets a great shape, but nobody removes the bulk. It looks fine on day one, then grows into a helmet within two weeks.
Men often blame themselves, assuming their hair is just “unmanageable.” It seems more often that it simply wasn’t finished for its density.
Treating the Whole Head as One Density
| Mistake | What Happens | The Fix |
| Thinning a sparse crown | Scalp shows, cowlick appears | Leave crown weight intact |
| Leaving dense sides untouched | Boxy, wide shape | Debulk or fade tighter |
| Harsh lineup on thinning hairline | Exaggerates recession | Follow the natural line |
| Razor cutting fine hair | Wispy, stringy ends | Use blunt or point cutting |
| Thinning shears on tight curls | Frizz, uneven shape | Shape curls dry instead |
| Shiny product on low density | Hair looks thinner | Switch to matte |
| Skipping the dry check | Surprises after washing | Always finish dry |
These mistakes come into sharper focus when you see them play out with real people in the chair.
Stories From the Chair
The Freshman With the Hair Helmet
Tyler, a college freshman, came in with hair so dense it looked like a bicycle helmet. He’d been getting quick cuts at a chain salon, and they’d been shortening his hair without removing any bulk.
I spent most of the appointment debulking: thinning shears underneath, channel cuts on top, and point cutting at the ends. When I blow-dried it, his hair finally moved.
He shook his head side to side like a dog after a bath and laughed. “It feels like I lost a pound,” he said. Perhaps he did.
The Dad Keeping an Eye on His Crown
Mike, a father of three in his early forties, sat down one evening and quietly asked, “Can you do anything about the back?” His crown had started to thin, and his old cutter had been thinning it out along with the rest of his top.
I put the thinning shears away for that zone. I left the crown slightly longer, shortened the sides to reduce contrast, and finished with a little matte clay. Under the shop lights, the difference was clear.
He didn’t say much. He just nodded at the mirror a few times. Sometimes that nod says everything a man won’t say out loud.
The Gift Card That Started a Habit
A woman bought a gift card for her husband’s birthday. He’d been cutting his own hair at home with a cheap clipper for years. His hair was thick but uneven, with dense sides and a medium top.
We spent the first visit simply understanding his head. I showed him where the density changed and how his crown grew. He left with a taper, debulked sides, and a light textured top. Six months later, he still books every four weeks. His wife sent a thank-you note that’s still pinned behind the front counter.
Stories like these often lead to practical questions about time and money.
Cost, Upkeep, and Where Density Cutting Is Heading
Why Density Affects Time and Price
| Density | Typical Appointment Time | Common Price Range | Why |
| Low | 25 to 35 minutes | $30 to $45 | Less hair to remove, more careful shaping |
| Medium | 30 to 45 minutes | $30 to $55 | Balanced work |
| High | 40 to 60 minutes | $40 to $70 | Debulking and texturizing take time |
| Curly or coily, high density | 45 to 75 minutes | $45 to $80 | Dry shaping, sculpting, detail work |
Prices vary by city and skill level. Many shops charge the same base price regardless of density, but very dense or long hair may cost a little more because it simply takes longer.
Maintenance Schedules by Density
| Density | Short Styles | Medium Styles | Longer Styles |
| Low | Every 3 to 4 weeks | Every 4 to 5 weeks | Every 6 to 8 weeks |
| Medium | Every 3 weeks | Every 4 weeks | Every 6 weeks |
| High | Every 2 to 3 weeks | Every 3 to 4 weeks | Every 5 to 6 weeks |
Dense hair loses its shape faster because more strands grow at once, adding bulk quickly. Low-density hair can often go longer between cuts, though the crown may need attention sooner.
Texture, Honesty, and Thinning-Friendly Styles
Market research firms like Euromonitor International have tracked steady growth in men’s grooming, and I’ve noticed the conversation in the chair changing too. Men talk more openly about thinning, density, and what works for their hair. That honesty has led to styles that flatter every density.
Textured crops, short French crops, and natural curl styles have become mainstream partly because they’re forgiving. They work on dense hair with debulking and on sparse hair with blunt, close finishes.
Finding the Right Chair
When you search for a barber near me, it can be tempting to choose the closest shop with an open slot. But if density matters to you, perhaps ask a few questions first:
- “How would you finish a cut for my hair density?”
- “Do you use thinning shears on every client, or only when needed?”
- “Do you finish with a dry check?”
- “Can you show me where my hair is densest and where it’s thinner?”
A cutter who loves the craft will welcome those questions. You’ll hear it in how they answer.
Now let’s tackle the questions that come up most often in the chair.
Frequently Asked Questions
How do I know if my hair is low, medium, or high density?
Try the part test. Part your dry hair down the middle and look in the mirror. A wide, clearly visible scalp line suggests low density. A faint line suggests medium density. If you can barely see the scalp at all, you likely have high density. Ask your cutter to check different zones too, since density often varies across the head.
Is thick hair the same as dense hair?
Not always. Thick usually refers to the width of each strand, while density refers to how many strands grow per square centimeter. You can have dense hair with fine strands or sparse hair with coarse strands. Both affect how your cut should be finished.
Should thinning shears be used on fine hair?
Usually very lightly, if at all. Thinning shears remove bulk, and fine or sparse hair doesn’t have much bulk to spare. Over-thinning can leave the hair looking see-through. Blunt cutting or light point cutting often works better.
Why does my dense hair puff out after a week?
Dense hair grows many strands at once, so bulk builds quickly, especially at the sides above the ears. If bulk wasn’t removed during finishing, the hair pushes outward as it grows. Debulking, channel cutting, or a tighter taper can help.
Can a haircut make thinning hair look fuller?
Yes. Shorter, textured styles with matte finishes often make thinning hair look fuller. Keeping weight at the crown, softening the hairline, and shortening the sides to reduce contrast can make a noticeable difference.
Does hair density change over time?
It can. Many men see density decrease with age, especially at the temples and crown. According to the American Hair Loss Association, about two-thirds of American men experience noticeable hair loss by age 35. Your finishing approach may need to change as your hair changes.
What product works best for low-density hair?
Lightweight, matte products like texture powder, light clay, or sea salt spray usually work best. They add grip and lift without weighing hair down. Avoid shiny pomades and oils, which can make scalp more visible.
Should curly hair be thinned?
Usually not with traditional thinning shears. Curly hair tends to frizz when thinned unevenly. Instead, curly hair is often shaped dry, curl by curl, or sculpted with clippers and shears to control the silhouette.
With those answers in hand, let’s put everything together into a plan.
Your Density Finishing Plan and a Final Word
Before Your Next Cut: A Checklist
- Do the part test and notice your density at home
- Check your crown in a hand mirror under bright light
- Notice whether your sides puff out faster than your top grows
- Tell your cutter if thinning shears have caused problems before
- Ask for a dry check before the cut is finished
- Discuss blunt vs. textured ends for your density
- Choose matte or shine based on your coverage
- Book trims on a schedule that matches your density
- Bring a reference photo, but stay open to adjustments
Your Density Path Guide
| Your Situation | Main Finishing Approach | Product | Key Habit |
| Low density, straight | Keep weight, blunt ends | Matte powder or light clay | Blow-dry with root lift |
| Low density, thinning crown | Leave crown longer, shorter sides | Matte clay | Avoid shiny products |
| Medium density | Moderate texture | Clay or paste | Match finish to styling time |
| High density, straight | Debulk, channel cut | Firm paste or water-based pomade | Trim every 2 to 4 weeks |
| High density, wavy | Slide cutting | Sea salt, light cream | Release waves without frizz |
| Curly or coily | Dry shaping, sculpting | Curl cream, leave-in | Fewer shampoos, moisture focus |
A Final Word From the Chair
I keep thinking about those two brothers with the same photo and different hair. Perhaps they’re a good reminder that a haircut isn’t just a shape. It’s a conversation between the cut and the head it sits on.
Density is one of the quietest parts of that conversation. It doesn’t shout like curl pattern or length. But it shapes everything: how the hair falls, how it grows, how it reflects light, and how long it keeps its shape.
You don’t need to memorize every technique in this guide. Maybe just notice your own density a little more. Ask a few questions the next time you sit in that leather chair, with the clippers humming and the smell of talc hanging in the warm air. Watch how your cutter finishes your hair, and whether they adapt to what’s actually there.
And if any of this rings true for you, take it with you. If it doesn’t quite fit, that’s fine too. Hair is personal, and every head teaches something new. After all these years behind the chair, I’m still learning from every one that sits down.