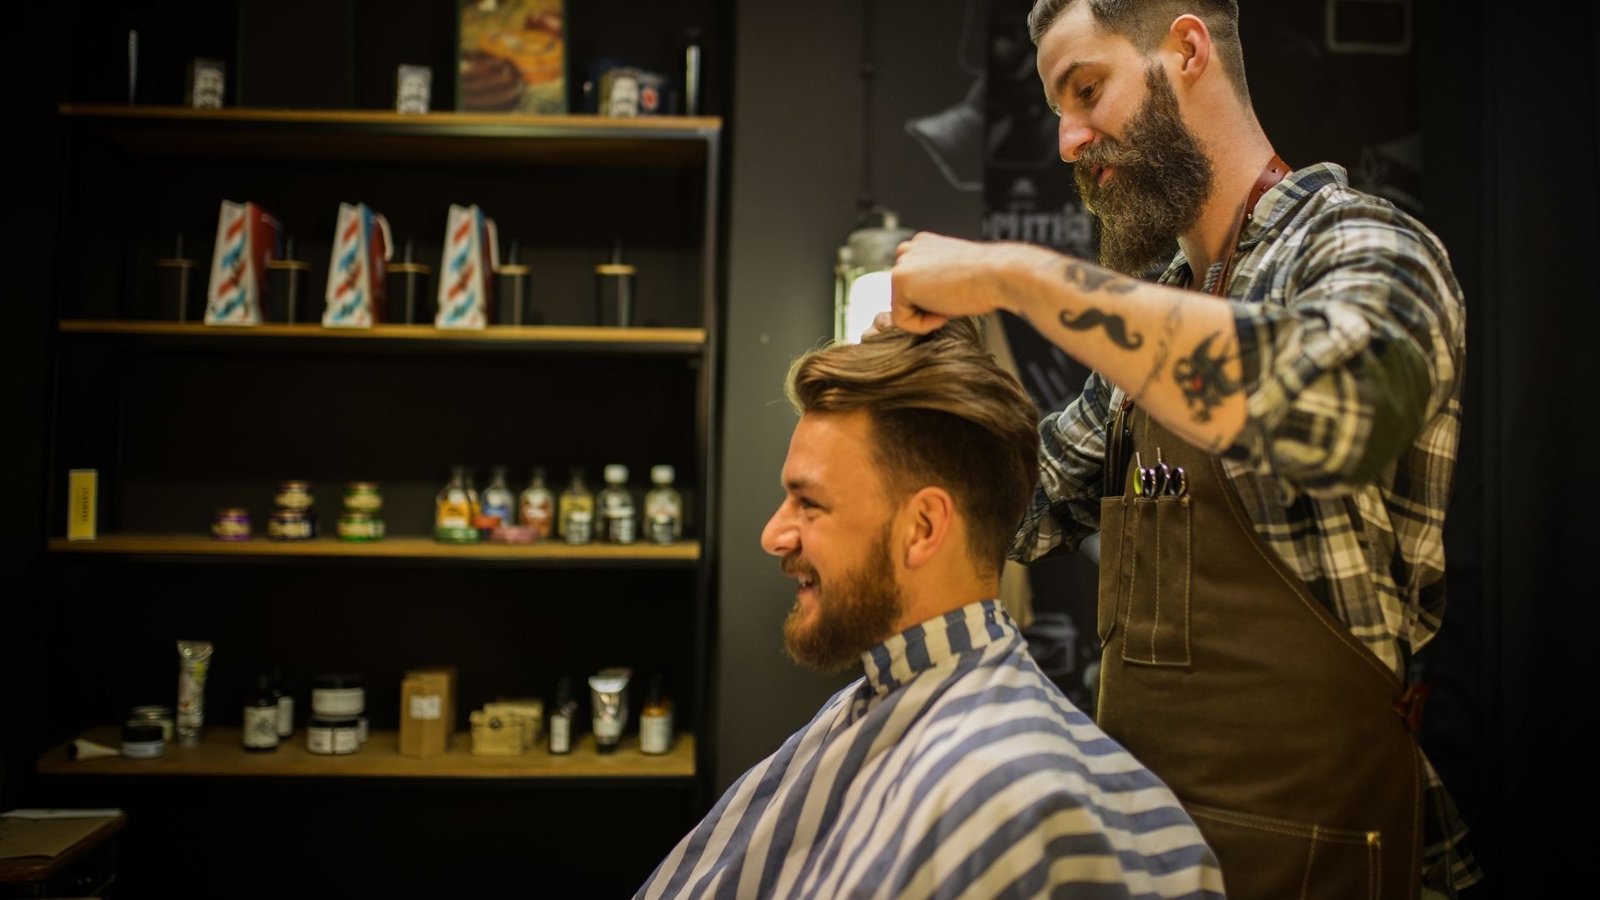
Every chair in every shop has a story, and most of them start the same way: someone walks in wincing under a hat, hoping nobody notices what happened last time they sat down for a trim. After two decades behind the clippers, I can tell you this much. The mistakes repeat themselves. The hair changes, the trends change, but the errors that ruin a good cut are almost always the same handful of problems, made by the same handful of shortcuts. This guide walks through what goes wrong, why it goes wrong, and exactly how a trained professional straightens it out, whether you’re the one in the chair or the one booking an appointment for your kid.
Key Takeaways
- Most bad haircuts come down to five repeatable errors: poor sectioning, wrong tool for the hair type, rushed consultations, ignoring growth patterns, and skipping the dry check.
- A fade gone wrong usually means the blend was built from the wrong guard sequence, not that the barber “messed up” randomly.
- DIY and budget cuts fail most often at the neckline and part line, two spots that require steady hands and good light.
- Kids’ haircuts carry their own rulebook: shorter attention spans mean barbers need faster, safer techniques that still produce a clean result.
- A great barbershop fixes mistakes with patience, not more cutting. Correction work is slower and more deliberate than a first cut.
What Actually Makes a Haircut Good or Bad?
A haircut isn’t good just because it looks sharp walking out of the shop. It’s good if it still looks sharp on day four, holds its shape through a workout, and grows out without turning into a shaggy mess by week three. That’s the standard a professional barber works toward, and it’s the standard most mistakes fail to meet.
The Three-Day Test Every Pro Uses
Any barber worth their chair knows a haircut has to pass the three-day test. Hair settles after a cut. Natural oils redistribute, cowlicks reassert themselves, and the scalp’s own texture starts talking back. A cut that only looks good fresh out of the chair, with gel and a blow-dryer doing half the work, was never finished properly. The real test comes on day three, when the client wakes up, runs a hand through it, and it still falls into place.
This is why a rushed consultation causes so much long-term damage. If the barber never asked how you sleep, how often you wash your hair, or whether you’ve got a cowlick at the crown, they’re cutting for the mirror, not for your Tuesday morning.
Symmetry Isn’t the Same as Balance
New clients often ask for “even” sides, assuming that means identical measurements on both sides of the head. Heads aren’t symmetrical. Almost nobody’s skull, hairline, or ear height matches side to side. A skilled barber cuts for balance, adjusting the guard or scissor angle slightly on each side so the finished result reads as even to the eye, even though the actual numbers differ by a few millimeters.
| Concept | What Clients Expect | What Barbers Actually Measure |
| Symmetry | Identical length both sides | Balanced appearance, adjusted per skull shape |
| Fade Height | Same guard everywhere | Height matched to hairline and ear position |
| Part Line | Dead straight part | Natural part following growth direction |
| Neckline | Hard horizontal line | Shape-matched to hairline growth curve |
Why “Good Haircut” Means Something Different for Every Head Shape
Ask ten people what makes the best haircut and you’ll get ten different answers, because the best haircut for a round face isn’t the best haircut for a long, narrow one. Barbers train on face shape analysis for a reason. A high, tight fade might sharpen a round face by adding visual height, while the same cut on a long face stretches it further and looks off balance. This is the single biggest reason clients leave unsatisfied even when the technical execution was flawless. The cut was good. It just wasn’t right for that face.
The Science Behind Why Haircuts Go Wrong
Cutting hair looks simple from the client’s chair. From the barber’s side, it’s closer to sculpting with a moving, unpredictable material. Hair growth patterns, density, and texture all change the math on every single head.
Growth Patterns and Cowlicks Explained
Hair doesn’t grow straight up out of the scalp. Each follicle sits at an angle, and those angles form patterns, usually spiraling outward from one or two crown points. According to the American Academy of Dermatology, scalp hair grows at an average rate of about half an inch per month, but the direction of that growth is what actually determines how a haircut falls once it’s dry.
A cowlick is simply a spot where the growth direction reverses or spirals sharply, pushing hair to stand up or flip against the rest of the style. Barbers who ignore cowlicks end up with clients who have a perfect cut in the chair and a sprung-up tuft of hair by the time they get home. The fix isn’t more cutting. It’s cutting with the growth pattern, sometimes leaving extra length right at the cowlick so it has enough weight to lie flat.
Hair Texture Categories and Why They Change the Technique
Texture dictates almost every decision a barber makes, from blade choice to cutting angle. The four broad categories, straight, wavy, curly, and coily, each respond differently to tension, and tension changes how the hair looks once it springs back.
| Hair Texture | Shrinkage When Dry | Best Cutting Method | Common Mistake |
| Straight | Minimal | Dry cutting or point cutting | Over-thinning, leaving blunt ends too heavy |
| Wavy | 10-20% | Cut slightly longer than target | Cutting wet without accounting for spring-back |
| Curly | 30-40% | Cut dry, curl by curl | Cutting too short while hair is stretched wet |
| Coily | Up to 50-75% | Dry cutting almost exclusively | Using wet-cut measurements, resulting in major shrinkage |
This chart alone explains why a barber who’s excellent with straight hair can still butcher a curly cut. Curly and coily hair needs to be assessed in its natural, dry state because wet hair stretches out and misleads the scissors. Cut curly hair wet to a length that looks right in the chair, and it can shrink up to half its length once dry, leaving a cut that’s far shorter than intended.
Density, Diameter, and Why “Thick” Doesn’t Mean What You Think
Clients often say they have “thick hair” when they actually mean high density (more strands per square inch) or coarse diameter (thicker individual strands). These are different problems with different solutions.
- High density, fine diameter: Lots of thin strands. Needs texturizing to reduce bulk without losing volume.
- Low density, coarse diameter: Fewer but thicker strands. Needs weight removed carefully to avoid looking sparse.
- High density, coarse diameter: The hardest combination to manage. Requires heavy thinning shears and patience.
- Low density, fine diameter: Needs length and layering strategy to create the illusion of fullness.
Mixing up these categories is one of the quieter mistakes in barbering. A barber who thins a low-density head the same way they’d thin a high-density head can leave a client looking thin on top, which is the last thing most clients want to hear after a haircut.
The Consultation: Where Most Haircut Disasters Actually Begin
If I had to point to one single cause behind the majority of bad haircuts I’ve fixed over the years, it wouldn’t be scissor skill or clipper guard choice. It would be a rushed, skipped, or misread consultation.
Why a 90-Second Conversation Prevents a 3-Week Regret
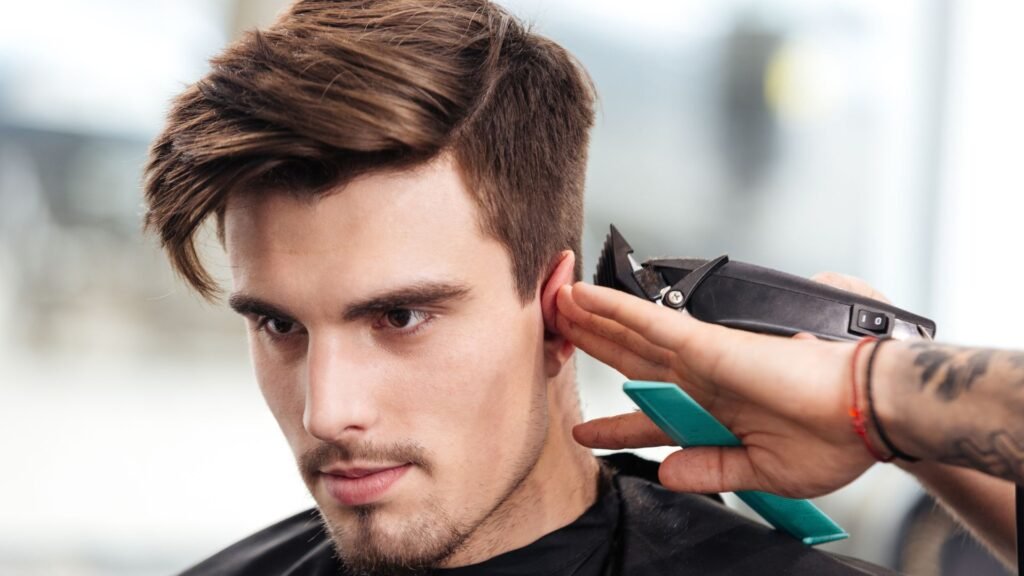
A proper consultation covers four things: desired length, lifestyle and maintenance habits, problem areas like cowlicks or scars, and reference photos if the client has them. Skipping this step is how a client who wanted “just a trim” ends up with three inches gone, or how a guy who said “like the picture” gets a cut that technically matches the photo but completely ignores his receding hairline.
A good barber translates vague language into technical terms. “Not too short” might mean a number 4 guard to one client and a number 2 to another. “Clean but not bald” might mean a skin fade to one person and a complete misunderstanding to someone who actually wanted length on top with just a tight neckline.
Reading Reference Photos the Right Way
Reference photos help, but they can also mislead a barber who takes them too literally. The photo shows a finished style, not the starting hair type, face shape, or growth pattern of the person sitting in front of them. A trained barber uses the photo as a direction, then adjusts proportions to fit the actual head shape, hairline, and density of their client.
| Reference Photo Element | Translates Directly | Must Be Adjusted For Client |
| Overall silhouette | Yes | No, adjust for head shape |
| Fade height | Somewhat | Yes, based on hairline position |
| Length on top | Somewhat | Yes, based on hair density |
| Part placement | No | Yes, based on natural growth pattern |
| Texture/finish | Yes | No, based on hair type of model in photo |
The Questions Every Barber Should Ask (and Rarely Does)
A tight shop schedule pressures barbers to skip questions, and that’s where trouble starts. The essential questions include: How often do you wash your hair? Do you style it yourself at home, and with what products? Do you have any cowlicks or scars you want covered? Is there an upcoming event this cut needs to hold up for? Each answer shapes a decision the client never sees happening, but absolutely feels in the final result.
Haircut Mistakes at the Barbershop: The Repeat Offenders
Every shop has a list of mistakes that come back again and again. Most aren’t about skill. They’re about rushing, poor lighting, or outdated technique.
Uneven Sideburns and Why They’re Almost Never Actually Uneven
Clients frequently come in convinced their sideburns are uneven, when in reality their ears sit at slightly different heights, which is extremely common and totally normal. A barber correcting this issue doesn’t match the sideburns to each other. They match each sideburn to its own ear and hairline, which sometimes means the two sideburns end at technically different heights but look balanced to the eye.
The Crooked Part Line
A part line that wanders is almost always caused by cutting against the natural growth direction instead of with it. Fixing a crooked part means re-establishing where the hair naturally wants to fall, then cutting the part slightly into that line rather than forcing a mathematically straight line against the grain.
Over-Thinned Crown
Thinning shears are powerful tools, and overuse creates a “halo” effect where the crown looks sparse under direct light. This mistake is common with barbers who thin hair uniformly across the head instead of concentrating thinning only where bulk actually needs reducing, typically at the perimeter and underneath layers, not at the visible surface of the crown.
The Dreaded Neckline Step
A neckline cut too high, too square, or without following the natural hairline curve leaves a visible “step” a few weeks later as hair grows back unevenly. Correcting it means softening the hard line into a rounded or tapered shape that follows the client’s actual hairline instead of an arbitrary straight cut.
Choppy, Uneven Bangs
Bangs cut without point-cutting technique (cutting into the ends at an angle rather than straight across) create a blunt, choppy line that looks heavy and artificial. The fix involves softening the ends with point cuts and sometimes razor work to break up the line naturally.
| Common Mistake | Root Cause | Typical Fix |
| Uneven sideburns | Ears at different heights (normal) | Match sideburn to ear, not to each other |
| Crooked part | Cutting against growth pattern | Re-cut along natural growth direction |
| Over-thinned crown | Uniform thinning across whole head | Targeted thinning at perimeter only |
| Neckline step | Square cut ignoring hairline curve | Soft taper following natural hairline |
| Choppy bangs | No point-cutting technique used | Point cut and razor-soften the ends |
Clipper Over Comb vs. Scissor Over Comb: Picking the Right Tool
One of the most frequent behind-the-chair debates is whether a cut calls for clipper work or scissor work, and getting this choice wrong is responsible for a huge share of bad fades and uneven tops.
What Clipper Over Comb Does Best
Clipper over comb uses a comb to lift hair away from the scalp while the clipper blade trims what extends past the comb’s teeth. This method is faster and ideal for creating consistent length across larger sections, which makes it the standard choice for fades, tapers, and most short men’s cuts.
What Scissor Over Comb Does Best
Scissor over comb achieves the same lifting technique but swaps the clipper for scissors, offering more control and a softer finish. This method shines on top sections where texture needs to be preserved, or on finer hair where clipper blades might create visible lines.
Head-to-Head: Clipper Over Comb vs. Scissor Over Comb
| Factor | Clipper Over Comb | Scissor Over Comb |
| Speed | Faster | Slower, more deliberate |
| Precision | Good for broad sections | Better for fine detail |
| Best Use Case | Fades, tapers, buzz cuts | Top sections, textured finishes |
| Risk of Visible Lines | Higher on fine hair | Lower, blends more naturally |
| Skill Ceiling | Moderate | High, takes years to master |
A barber who defaults to clippers for everything risks leaving visible demarcation lines on fine or thin hair. A barber who tries to scissor-cut an entire skin fade will be in that chair far longer than necessary and may struggle to achieve the same crisp blend a clipper naturally produces near the skin.
Fades Gone Wrong: Diagnosing the Blend
Fades are probably the single most requested style in modern barbershops, and also the style most likely to go sideways when the barber skips steps.
Why Fades Look Patchy or Striped
A patchy fade almost always comes from skipping guard numbers in the blending sequence. Jumping from a 2 guard directly to skin without passing through intermediate lengths leaves a visible stripe instead of a smooth gradient. Correcting this means going back through the missed guard lengths, essentially re-blending the transition zone millimeter by millimeter.
The Guard Sequence That Actually Works
A clean fade typically moves through several guard lengths in sequence, blending each transition with overlapping passes rather than hard stops. A typical sequence for a mid fade might look like this:
| Step | Guard Length | Zone | Technique |
| 1 | Skin or 0.5 | Lowest point near ear/neck | Flat clipper against skin |
| 2 | 1 | Just above skin zone | Overlapping upward flicks |
| 3 | 2 | Mid-transition zone | Light pressure, bevel motion |
| 4 | 3 | Upper transition zone | Blend into longer top hair |
| 5 | Scissor work | Top section | Connect length to fade |
Low Fade vs. High Fade vs. Mid Fade
| Fade Type | Starting Point | Best For | Maintenance Frequency |
| Low Fade | Just above ear | Conservative, workplace-friendly | Every 3-4 weeks |
| Mid Fade | Mid-way up the side | Most versatile, balances most face shapes | Every 2-3 weeks |
| High Fade | Near the temple | Bold, high-contrast looks | Every 2 weeks |
Choose a low fade if you want subtlety and longer time between visits. Choose a high fade if sharp contrast matters more to you than stretching out your barbershop schedule.
DIY Haircuts vs. Professional Barbershop Cuts
Home haircuts have grown more common, partly out of necessity and partly out of confidence built from online tutorials. The results, though, tell a consistent story.
The Neckline Problem Nobody Can Fix on Themselves
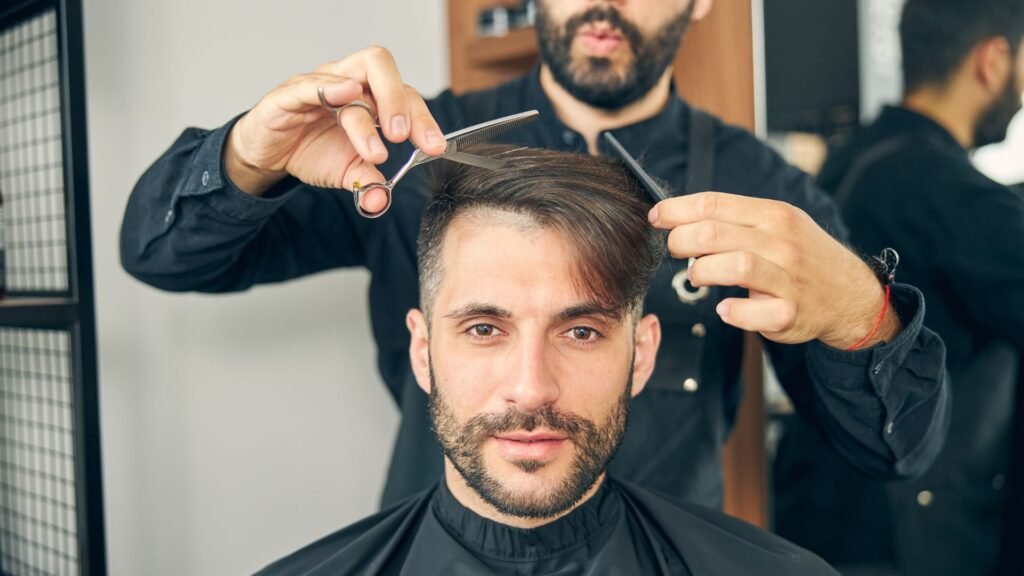
Cutting your own neckline is nearly impossible to do well, since it requires seeing and reaching the back of your own head simultaneously, a physical contortion most people can’t manage with clean results. This is the number one callback issue barbers see from at-home attempts.
Where DIY Actually Holds Up Fine
Simple buzz cuts with a single guard length, done carefully and in good lighting, can hold up reasonably well at home. The margin for error shrinks dramatically the moment multiple guard lengths or any scissor work enters the picture.
Direct Comparison: DIY vs. Barbershop
| Factor | DIY at Home | Professional Barbershop |
| Neckline Precision | Poor to fair | Excellent |
| Fade Blending | Very difficult | Reliable with skilled barber |
| Cost Per Cut | Low, upfront tool cost only | 20-60 depending on region |
| Time Investment | 20-40 minutes, variable results | 20-45 minutes, consistent results |
| Risk of Mistakes | High | Low, correction included |
| Social/Relaxation Value | None | Hot towel, conversation, ritual |
Choose DIY if your style is a simple one-length buzz and budget is the top concern. Choose a professional cut if your style involves any fading, layering, or a neckline that needs to look clean from every angle.
Kids’ Haircuts: A Different Set of Rules Entirely
A kids haircut isn’t a smaller version of an adult cut. Children move more, tolerate less, and often can’t articulate what they want the way an adult client can, which means barbers have to adapt their entire approach.
Why Speed Without Sacrificing Safety Matters Most
Most children have a limited window of patience, often somewhere between ten and fifteen minutes before wiggling turns into real movement risk near clippers and scissors. Barbers who specialize in kids’ cuts build speed through practiced technique, not by rushing carelessly. Clipper guards tend to replace scissor work far more often in kids’ cuts simply because clippers carry less risk if a child moves suddenly.
Common Kids’ Haircut Mistakes
- Cutting too close to the ears without a protective comb guide, risking small nicks on a squirming child.
- Ignoring cowlicks at the crown, which are extremely common in young children and cause cuts to look messy within days.
- Using adult-length guard logic on finer baby-fine hair, resulting in a cut that looks far more severe than intended once dry.
- Skipping the “distraction” step, like a tablet or a parent’s hand to hold, which increases the odds of sudden movement during detail work.
Building Trust for Repeat Visits
A child’s first few haircuts shape whether they’ll tolerate the chair for years to come. Barbers who specialize in children often slow down the first visit intentionally, letting the child sit in the chair without clippers running just to get comfortable with the environment, the smell of the shop, and the sound of the tools before any actual cutting begins.
The Cost of Getting It Wrong: Budgeting for Quality
Price and quality don’t always move together in this industry, but there are patterns worth understanding before you decide where to book.
What You’re Actually Paying For
A $15 cut and a $60 cut rarely use different clippers. The difference usually comes down to consultation time, skill level built over years of repetition, and the experience surrounding the cut itself, from the chair to the hot towel to the finishing products.
| Price Range | Typical Consultation Time | Common Setting | Correction Policy |
| 15-25 | Under 2 minutes | Chain/walk-in shops | Rarely included |
| 25-45 | 3-5 minutes | Independent barbershops | Often free within a week |
| 45-80+ | 5-10 minutes, detailed | Premium/master barber shops | Always included |
When Paying More Actually Saves Money
A cheap cut that needs a correction two days later effectively costs you twice, both in money and in time spent looking at a haircut you don’t like. Clients chasing the best haircut for their money often do better finding one reliable barber at a mid-range price point and sticking with them, since repeat clients benefit from a barber who already knows their growth patterns, cowlicks, and preferences.
Tipping and Its Role in Correction Quality
Tipping culture varies by region, but barbers consistently note that regular clients who tip well and show loyalty tend to receive extra attention on detail work, like cleaner necklines and more careful blending, simply because that relationship has built trust and rapport over repeated visits.
Product and Styling Mistakes That Undo a Good Cut
Even a flawless haircut can look sloppy within a day if the wrong products or techniques get applied at home afterward.
Using the Wrong Product for Your Hair Type
| Hair Type | Recommended Product | Common Mistake Product |
| Fine/Thin | Light pomade or sea salt spray | Heavy wax, weighs hair down |
| Thick/Coarse | Strong hold pomade or clay | Light gel, provides no real hold |
| Curly | Curl cream or leave-in conditioner | Alcohol-based gel, causes frizz and dryness |
| Straight | Light matte paste | Shine-heavy pomade, looks greasy |
Overwashing and Its Effect on Style Longevity
Washing hair daily strips natural oils that actually help styles hold their shape. Dermatologists commonly recommend washing most hair types two to four times per week rather than daily, since natural oils support both scalp health and manageability.
Blow-Drying Technique Mistakes
Drying hair in the wrong direction, against the cut’s intended lay, fights the barber’s work before the style ever has a chance to settle. Barbers often recommend drying hair in the direction it was cut to fall, using a round brush or fingers to guide it rather than randomly blasting heat at the scalp.
Expert Insights: What Master Barbers Watch For Trends-Wise
Barbering has always moved in cycles, and understanding where current trends sit in that cycle helps explain why certain mistakes have become more common in recent years.
A Quick Historical Timeline of Men’s Barbering Trends
| Era | Dominant Style | Notable Technique Shift |
| 1920s-1940s | Slicked side parts | Straight razor and pomade dominance |
| 1950s-1960s | Pompadours, crew cuts | Rise of electric clippers in shops |
| 1970s-1980s | Longer, layered styles | Scissor-heavy techniques return |
| 1990s-2000s | Buzz cuts, spiky gel styles | Clipper guard standardization |
| 2010s-Present | Skin fades, textured tops | Clipper-scissor hybrid blending |
Why Skin Fades Demand More Precision Than Past Trends
The skin fade’s popularity has raised the technical bar across the industry, since blending hair down to bare skin leaves zero room to hide an uneven transition the way a longer guard length might have forgiven in past decades.
The Return of Classic Barbering Tools
Straight razors and hot towel shaves have made a notable comeback alongside the rise of traditional barbershop culture, with many shops leaning into the ritual experience as much as the haircut itself, offering scalp massages, beard trims, and classic shaves as part of the full visit.
Real-World Scenarios: How Barbers Actually Fix Common Disasters
Scenario One: The Uneven Fade From a Different Shop
A client arrives with a fade that’s patchy near the ears. The fix starts with assessing how short the existing fade is overall, then carefully re-blending from the lowest guard upward, often needing to take the whole fade slightly shorter than the client originally wanted just to have enough room to smooth out the transition properly.
Scenario Two: The Overly Thinned Top
A client comes in frustrated that their top looks thin and wispy after a previous cut used thinning shears too aggressively. Since hair can’t be un-cut, the fix usually involves letting length grow back somewhat while using strategic cutting to disguise thin areas until natural regrowth restores enough density for a proper restyle.
Scenario Three: The Botched At-Home Buzz Cut
A client who attempted a home buzz cut comes in with visible tram lines (ridges from uneven clipper pressure). The barber typically has to take the entire head down to the shortest visible line to even everything out, which often means a shorter cut than the client originally wanted, but it’s the only way to eliminate the unevenness cleanly.
Building Your Haircut Action Plan
Before You Book
- Decide on your maintenance tolerance: weekly, biweekly, or monthly visits change which styles will actually work for your lifestyle.
- Gather one or two reference photos, but be ready to discuss how your face shape and hair type might shift the final result.
- Note any cowlicks, scars, or problem areas in advance so you’re not explaining them rushed in the chair.
During the Consultation
- Use specific language: guard numbers, inches, or “like last time but shorter on top” rather than vague terms.
- Ask the barber directly what they’d recommend for your face shape and hair type, since most barbers appreciate being asked for their professional opinion.
- Speak up immediately if something feels off mid-cut. It’s far easier to adjust early than after the final blend is locked in.
After the Cut
- Wait the full three days before judging the final result, since hair settles into its true shape over that window.
- Ask for product recommendations specific to your hair type before you leave the chair.
- If something genuinely looks wrong, return to the same shop within a few days. Most reputable shops offer free correction visits within a week or two.
Frequently Asked Questions
Why does my haircut look different three days after I get it?
Hair settles after a fresh cut as natural oils redistribute and the hair relaxes from the styling products and blow-drying used in the shop. A properly cut haircut should still look good once it settles, which is why barbers often judge their own work by how it holds up days later, not just in the chair.
How often should I actually get a haircut to maintain a clean style?
Maintenance frequency depends heavily on the style. Fades generally need attention every two to three weeks to stay sharp, while longer, layered cuts can often stretch to five or six weeks between visits since there’s less contrast to maintain near the scalp.
Can a barber fix a haircut I did badly at home?
In most cases, yes, though it often requires taking the overall length shorter than you’d hoped in order to even out tram lines, patchy fades, or uneven sections. The shorter the correction, the more completely those mistakes can be eliminated.
Why do barbers ask so many questions before they start cutting?
A detailed consultation prevents the majority of common mistakes, since it clarifies length expectations, flags growth pattern issues like cowlicks, and confirms maintenance habits that affect which techniques will actually work for your lifestyle.
Is it true that curly hair should be cut dry instead of wet?
Yes, in most cases. Curly and coily hair types can shrink significantly once dry compared to their wet, stretched-out length, so cutting dry allows a barber to see the true, settled shape of each curl before trimming.
What’s the difference between a barber and a hairstylist?
Barbers traditionally specialize in men’s grooming, including clipper work, fades, and straight razor shaves, while hairstylists often train more broadly across coloring, chemical treatments, and longer hairstyling techniques. Many modern professionals cross-train in both disciplines, but the historical distinction still shapes most training programs.
How do I know if a barbershop is good before my first visit?
Look for shops with barbers who ask detailed consultation questions, offer visible portfolios of past work, and have a clear correction policy if something doesn’t turn out right. A shop’s willingness to fix mistakes for free within a reasonable window says a lot about their confidence in their own work.
Conclusion
A great haircut isn’t about a single dramatic moment with the clippers. It’s built from dozens of small, correct decisions made in sequence: the right questions asked up front, the right tool chosen for the texture in front of you, the right guard sequence followed instead of skipped, and the patience to check the result dry before calling it finished. Mistakes happen in every shop, including the best ones, but the difference between a good barber and a great one is how quickly and cleanly they can diagnose what went wrong and fix it without just cutting more hair and hoping for the best.
Next time you’re in the chair, don’t be afraid to ask questions, point out your cowlicks, or admit you tried cutting your own neckline last month. Every barber’s heard it before, and every good one knows exactly how to fix it.